Want to master CS2 configuration? Autoexec is your secret weapon for Counter-Strike 2 (formerly CS:GO). This configuration file stores all your console commands in one place. Set it up once, and never waste time entering commands again! Whether you're a competitive player aiming for Global Elite or exploring the tactical depths of CS2, autoexec streamlines your entire experience.
Counter-Strike 2 brings revolutionary changes with the Source 2 engine and subtick system. The good news? Your autoexec skills transfer perfectly! While file paths changed, the core concept remains identical. Understanding autoexec becomes essential for maintaining competitive edge in high-level play.
What you'll learn in this guide:
- Finding the CS2 autoexec location in Source 2 file structure
- Creating and configuring autoexec.cfg for CS2
- Essential CS2 commands for crosshair, viewmodel, and performance optimization
- Troubleshooting autoexec loading issues specific to Source 2
- Pro player configurations adapted for Counter-Strike 2
- Network optimization and FPS boost techniques
What Is an Autoexec and a Config File in CS2?
In CS2, all your in-game settings live in config.cfg. This configuration file uses the .cfg extension—a universal format for game configs that's been standard since the original Counter-Strike.
Here's where autoexec becomes essential. Rather than editing the default config (risky!), you create a separate autoexec.cfgfile. Valve designed this specifically for custom settings that persist through CS2 updates. When you modify the standard config file, game updates might overwrite your changes. Autoexec prevents this entirely! This separation ensures your carefully crafted settings survive every patch and update.
Source 2 engine improved settings persistence dramatically—your custom commands load reliably every time. Think of config.cfg as CS2's default settings blueprint, while autoexec.cfg stores your personal customizations. This separation protects your preferences from being reset during updates. The cfg file format remains text-based, making it easy to edit, share with teammates, and backup across different systems.
💡 Pro Tip: Never edit config.cfg directly! Always use autoexec.cfg for custom settings to avoid losing configurations during CS2 updates.
How to Locate the CFG Folder in CS2
Finding your CS2 autoexec location is step one. Source 2 engine uses a different directory structure than old CS:GO, so proper file path navigation is crucial.
⚠️ Important: CS2's file path differs from CS:GO! The new location is \game\csgo\cfg\ instead of the old \csgo\cfg\structure. Don't confuse these paths!
- Launch your Steam Client.
- Navigate to your Steam Library.
- Find Counter-Strike 2 in your games list. Right-click and select Properties.
- Click the Installed Files tab.
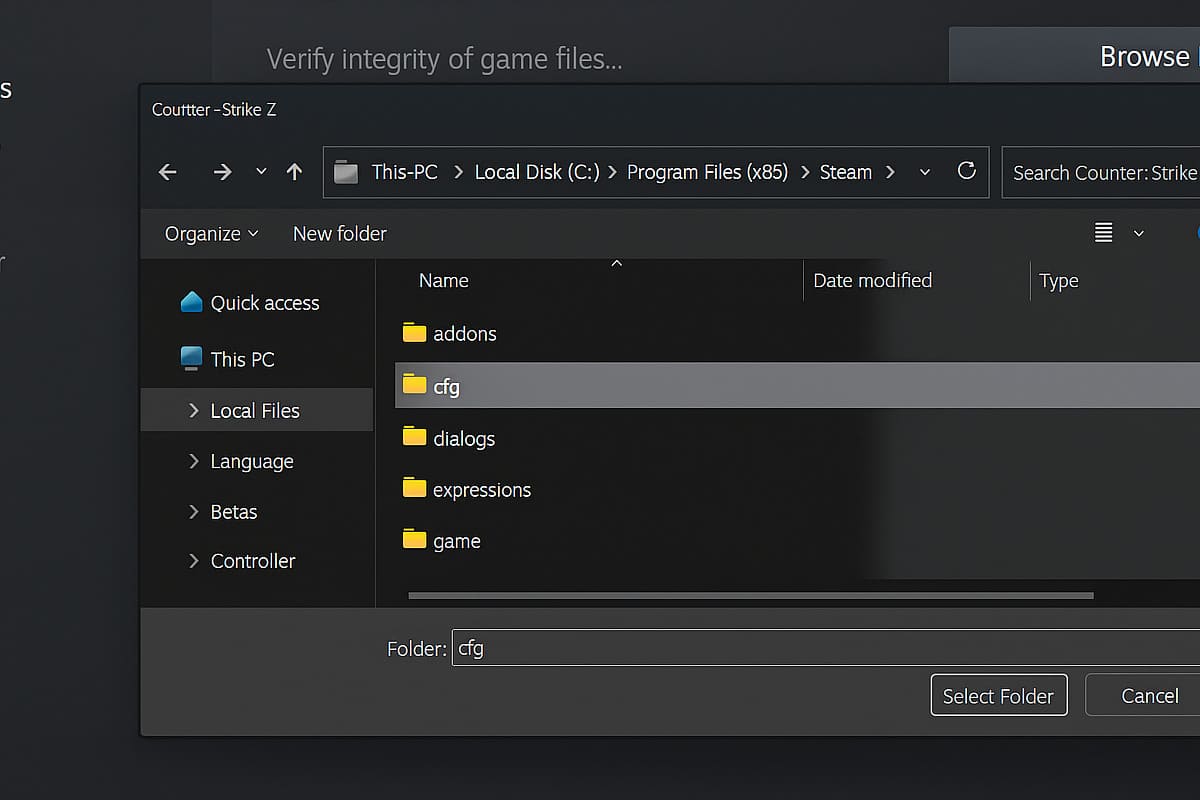
- Click the Browse button to open CS2's directory.
- Navigate to the game folder, then open csgo.
- Open the cfg folder—this is your destination!
- Look for autoexec.cfg. Can't find it? We'll create one next!
The file path typically follows: \Steam\steamapps\common\Counter-Strike Global Offensive\game\csgo\cfg. Your Steam ID folder structure also contains userdata configs at \Steam\userdata\[STEAMID]\730\local\cfg\ where Steam stores your main config.cfg file.
How to Create an Autoexec File in CS2
Ready to build your autoexec? The autoexec is just a text file with a .cfg extension. You can create it using Notepad—every Windows version includes this text editor.
The creation process works identically in CS2 as it did in CS:GO. Only the storage location changed with Source 2!
First Method
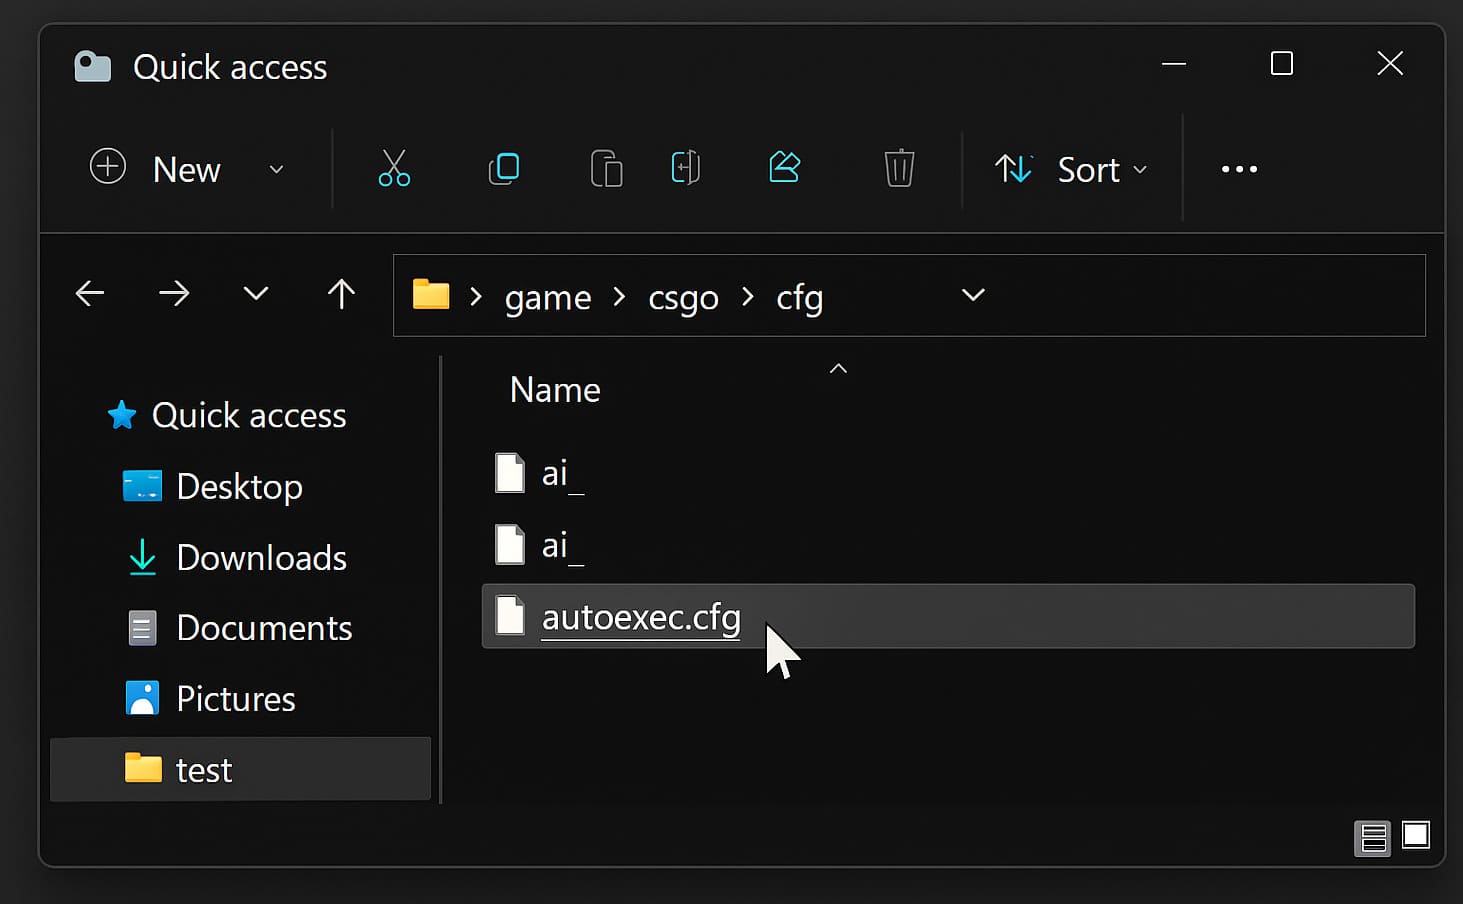
- Open the cfg folder. Your path: \Program Files\Steam\steamapps\common\Counter-Strike Global Offensive\game\csgo\cfg.
- Right-click in empty space. Select New → Text Document.
- Open the text file. Click File → Save As.
- Type autoexec.cfg in the File Name field. Set "Save as Type" to All Files. Click Save.
Your autoexec.cfg now exists in the correct CS2 directory!
Second Method
- Select any existing cfg file in your folder.
- Hold the right mouse button and drag the file to create a copy. Choose Copy.
- Press F2 to rename. Type autoexec.cfg—don't rename the original! Keep the .cfg extension.
- Open your new autoexec.cfg in Notepad. Press CTRL+A, then DELETE to clear it. Save.
💡 Pro Tip: The second method prevents accidentally creating autoexec.cfg.txt—a common mistake that breaks everything! Windows hides file extensions by default, making this method foolproof.
Last Step
Before your autoexec works properly:
- Open your autoexec.cfg file.
- Add host_writeconfig on the very last line.
- Save the file.
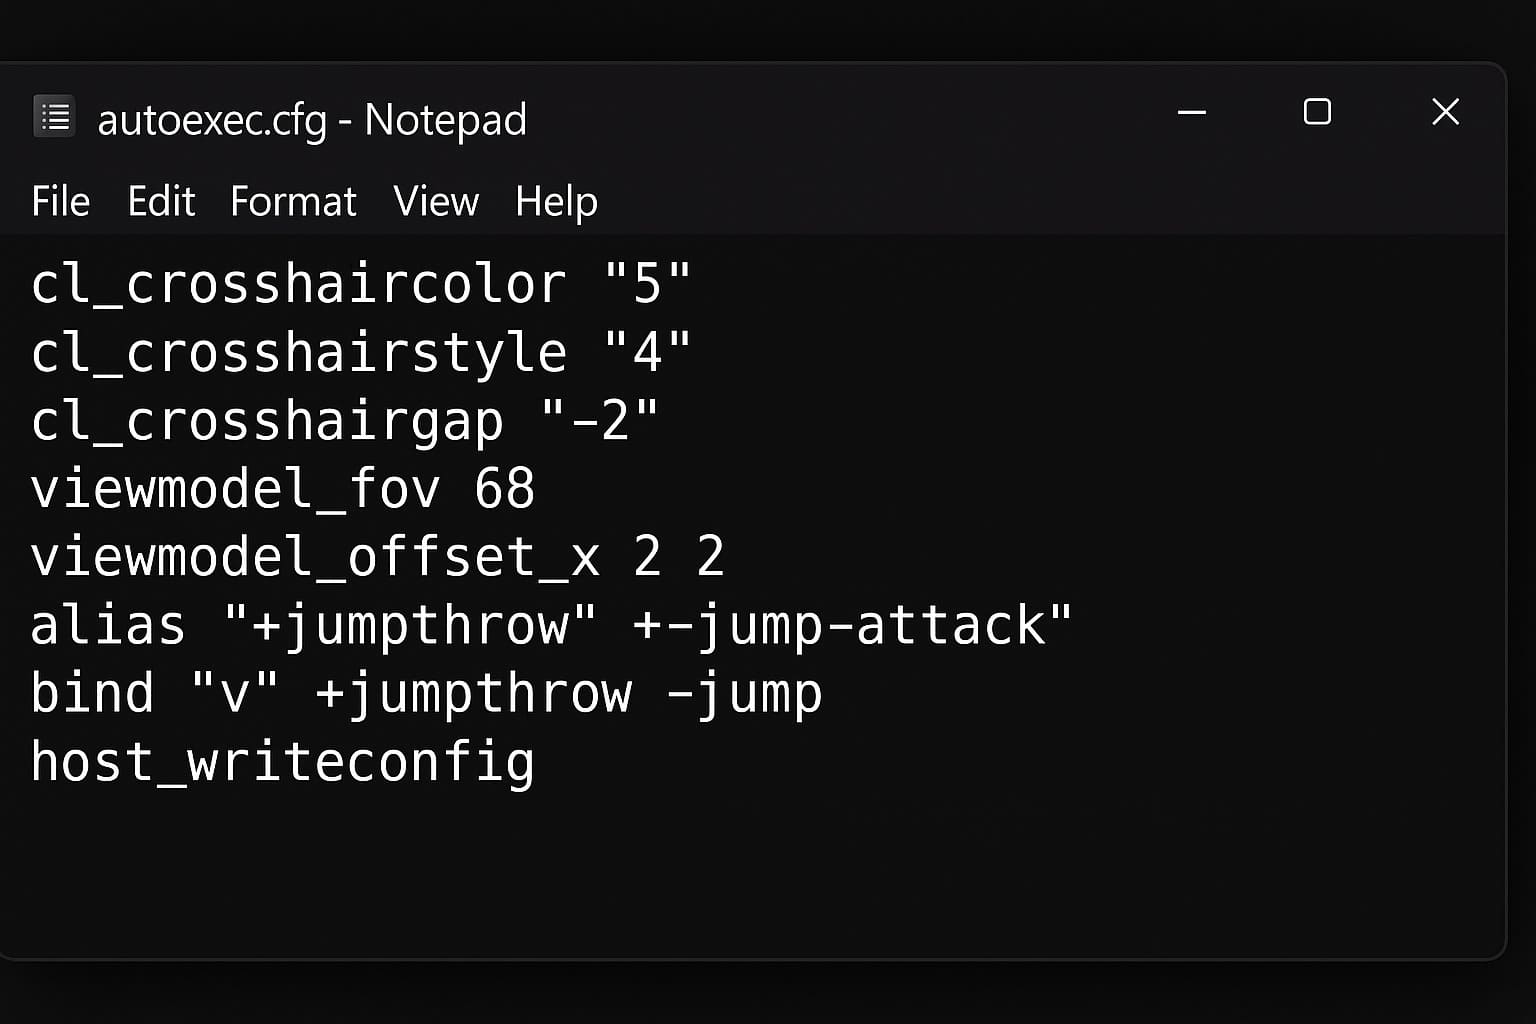
The host_writeconfig command tells CS2 to write your settings when autoexec executes. Without it, settings won't persist correctly!
Workarounds to Load Autoexec
Sometimes autoexec won't load automatically in CS2, even with proper setup. Here are proven workarounds:
Method 1: Add to config.cfg
- Locate config.cfg at: \Steam\userdata\[YOUR_STEAM_ID]\730\local\cfg\config.cfg.
- Open it and add exec autoexec at the end.
- Save changes.
Method 2: Use Launch Options
- Right-click Counter-Strike 2 in Steam.
- Select Properties.
- Find Launch Options at the bottom.
- Type +exec autoexec.cfg and close.
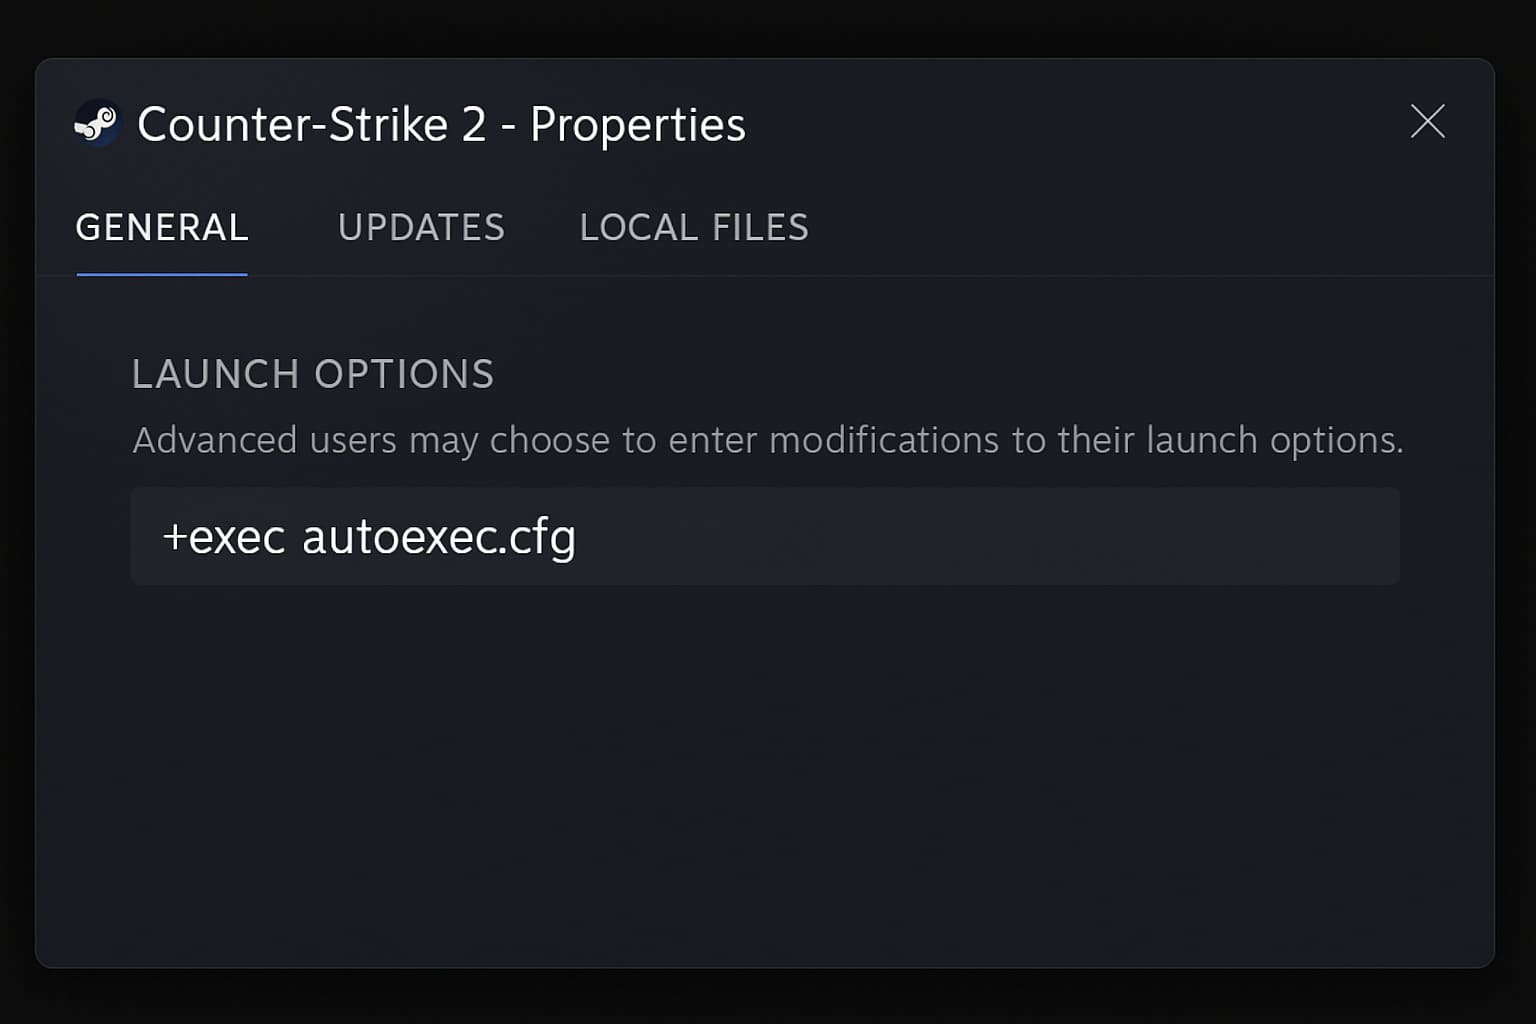
Use both methods for maximum reliability! These game launch parameters work together to force CS2 to load your configuration.
How to Run Autoexec in CS2
Verify everything works correctly. Running autoexec requires three components: host_writeconfig in your autoexec file, exec autoexec in config.cfg, and +exec autoexec.cfg in Steam launch options.
- Complete all previous steps.
- Launch Counter-Strike 2 and open developer console (press ~).
- Check for a message confirming autoexec loaded: "Executing autoexec.cfg".
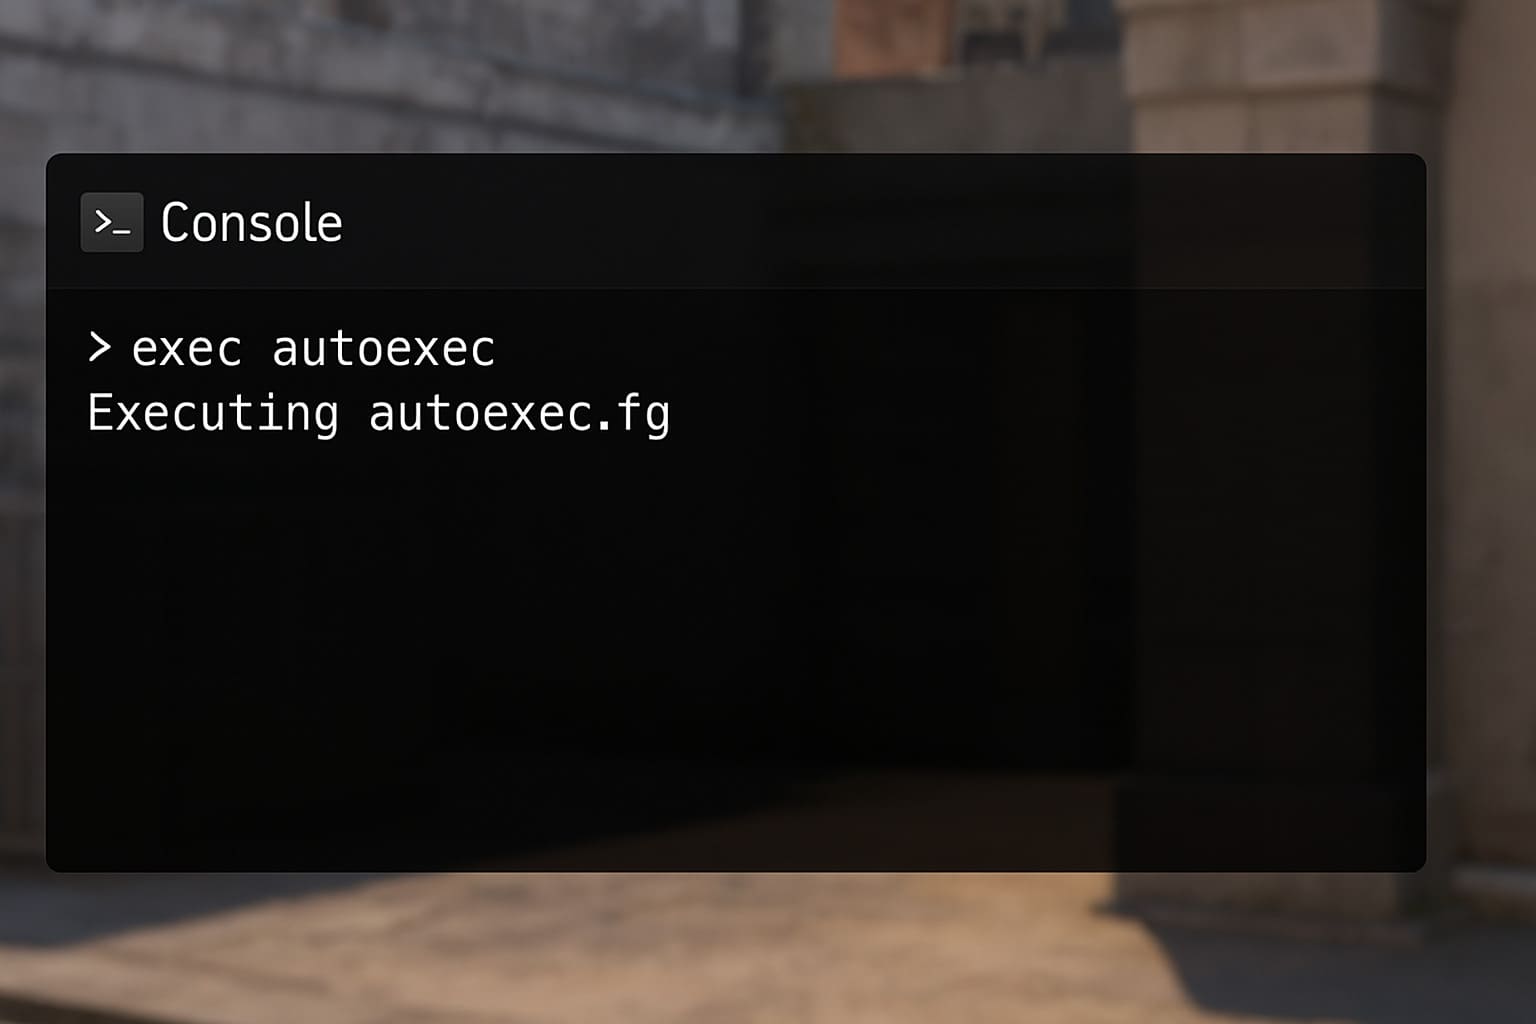
No message? Jump to the Troubleshooting section for solutions.
How to Open CFG Files
Opening cfg files works identically to any text file.
- Right-click any .cfg file.
- Select Open with.
- Choose Notepad. Check "Always use this app" for automatic handling.
- Click OK.
How to Edit CFG Files
Editing your autoexec is where customization begins! Every command you add personalizes your CS2 experience.
- Open your autoexec.cfg using the method above.
- Add your desired console commands. Example radar commands:
cl_radar_always_centered "0"
cl_radar_scale "0.3"
cl_radar_rotate "1"
- Save and close when finished.
Remember: autoexec.cfg must stay in the cfg folder! Don't move it to other directories.
What Autoexec Can Be Used For
Autoexec.cfg serves as your customization hub for console commands, keyboard binds, and performance optimization. Professional CS2 players treat their autoexec like a secret weapon—fine-tuned over thousands of hours to provide every possible advantage.
Common autoexec uses:
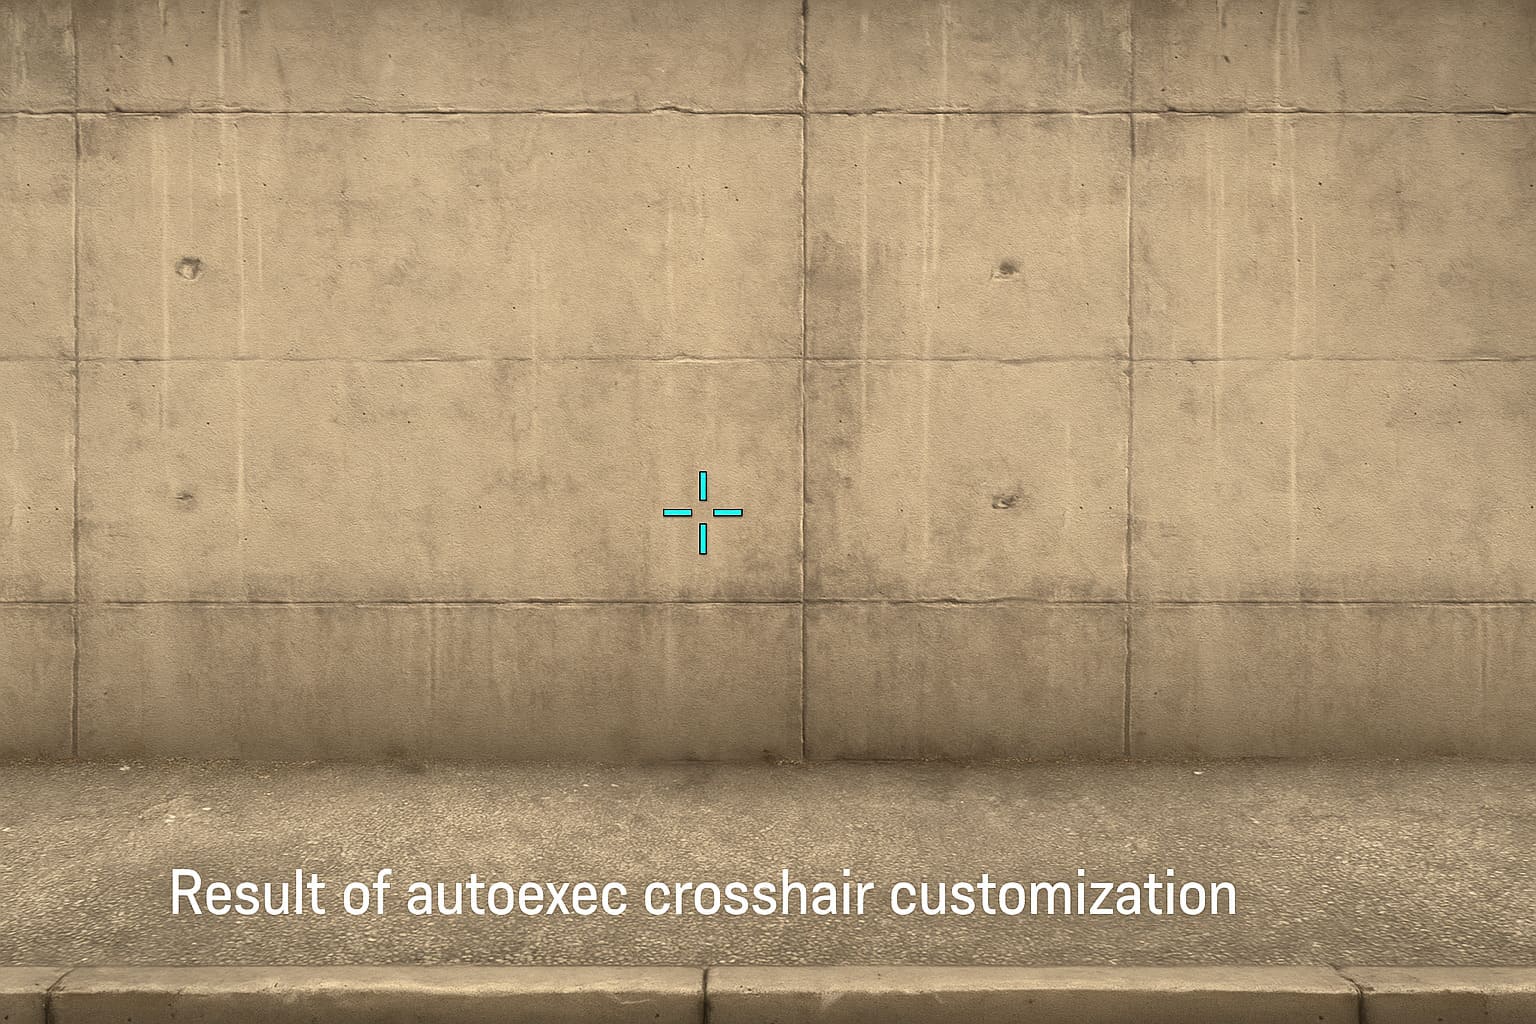
- Crosshair customization - Perfect cl_crosshair commands for your playstyle
- Viewmodel settings - Adjust weapon positioning with precise viewmodel commands
- Network optimization - Configure rate commands for smooth connections
- Performance tweaks - Set fps_max, cl_interp, net_graph, and other FPS boost options
- Bind commands - Create jumpthrow bind, buy binds, and voice_enable bind
- Practice configurations - Instantly transform servers into training environments
- Audio settings - Fine-tune volume settings and communication
- Alias commands - Create shortcuts that execute multiple commands with one keystroke
Here's why CS2's subtick system makes consistent settings crucial: unlike CS:GO's tick-based system, CS2 calculates actions between ticks for unprecedented precision. Your binds and timing commands need perfect consistency across sessions. Autoexec guarantees this reliability!
Popular bind examples:
// Jumpthrow bind for precise grenade throws
alias "+jumpthrow" "+jump;-attack"
alias "-jumpthrow" "-jump"
bind "v" "+jumpthrow"
// Voice toggle for quick communication control
bind "mouse5" "toggle voice_enable 0 1"
// Buy script for fast economy management
bind "kp_ins" "buy vesthelm;"
bind "kp_end" "buy ak47; buy m4a1;"
bind "kp_downarrow" "buy awp;"
// Fast weapon switching
bind "q" "lastinv"
// Utility binds
bind "mouse4" "use weapon_flashbang"
You can transfer autoexec between PCs effortlessly—just copy the file to another computer's cfg folder. This portability is invaluable for tournaments or when upgrading hardware. For quick setup, try online CS2 autoexec generators that help create configs through simple interfaces—perfect for beginners!
The Best Autoexec Config File for CS2
Ready for optimization? This section delivers verified CS2 commands that'll elevate your gameplay to competitive standards. These configs work perfectly with Source 2—we've tested every command!
Crosshair Settings
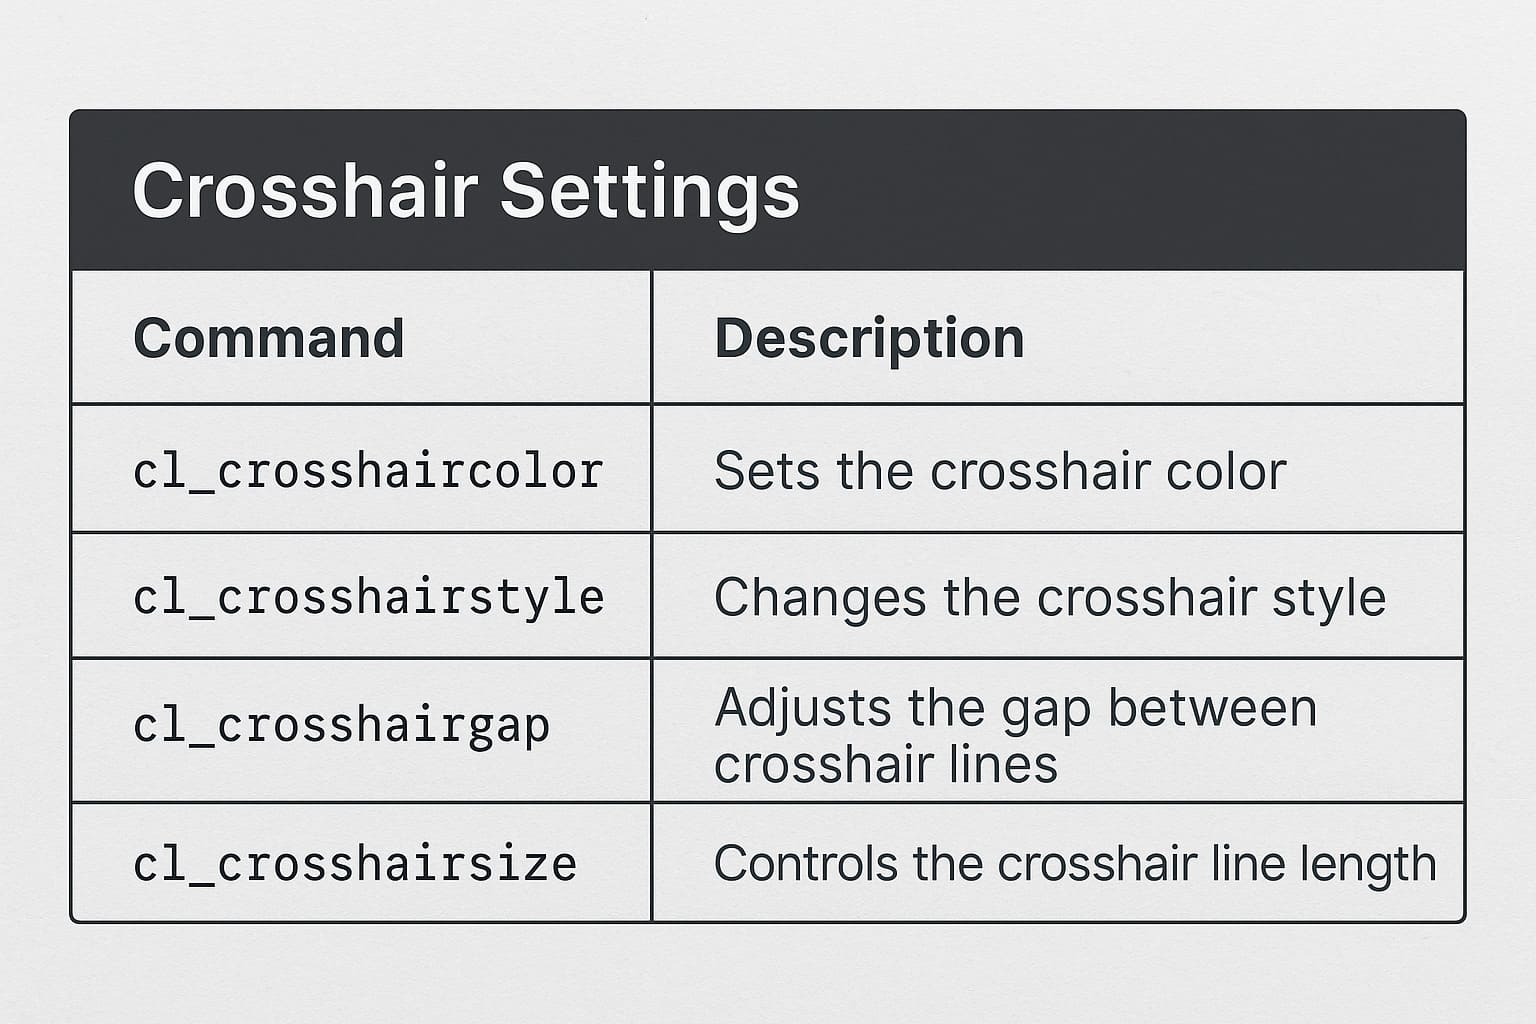
Crosshair commands remain largely unchanged in CS2, but Source 2's improved visuals make precise crosshairs more important:
| Command | Description |
|---|---|
| cl_crosshaircolor "5" | Colors: Red (0), Green (1), Yellow (2), Blue (3), Cyan (4), Custom (5) |
| cl_crosshairalpha "255" | Transparency (range: 0-255) |
| cl_crosshairdot "1" | Center dot. "1" for dot, "0" to disable |
| cl_crosshairsize "2" | Crosshair length (range: -20 to 20) |
| cl_crosshairstyle "2" | Crosshair type (0-5) |
| cl_crosshairthickness "0.5" | Line thickness |
| cl_crosshairusealpha "1" | Enables alpha transparency |
| cl_crosshair_drawoutline "1" | Black outline for visibility |
| cl_crosshairgap "-2" | Center gap size |
| cl_crosshair_outlinethickness "1" | Outline thickness |
Dynamic crosshair commands (for cl_crosshairstyle "2"):
| Command | Description |
|---|---|
| cl_crosshair_dynamic_maxdist_splitratio "0" | Animation intensity |
| cl_crosshair_dynamic_splitalpha_innermod "1" | Inner transparency during movement |
| cl_crosshair_dynamic_splitalpha_outermod "0.3" | Outer transparency during movement |
| cl_crosshair_dynamic_splitdist "3" | Distance between inner/outer crosshairs |
Viewmodel Settings
Viewmodel commands control weapon appearance. Source 2's enhanced visuals make proper configuration more impactful:
| Command | Description |
|---|---|
| cl_righthand "1" | Weapon on right (1) or left (0) |
| viewmodel_offset_x "2" | Horizontal position (range: -2 to 2.5) |
| viewmodel_offset_y "-2" | Depth position (range: -2 to 2) |
| viewmodel_offset_z "-2" | Vertical position (range: -2 to 2) |
| viewmodel_fov "68" | Field of view (range: 54 to 68) |
| cl_bobamt_lat "0.1" | Horizontal weapon bob |
| cl_bobamt_vert "0.1" | Vertical weapon bob |
| cl_bobcycle "0.98" | Bobbing speed |
| cl_viewmodel_shift_left_amt "0.5" | Weapon shift during shooting (left) |
| cl_viewmodel_shift_right_amt "0.5" | Weapon shift during shooting (right) |
| viewmodel_presetpos "3" | Presets: 1 (Desktop), 2 (Couch), 3 (Classic) |

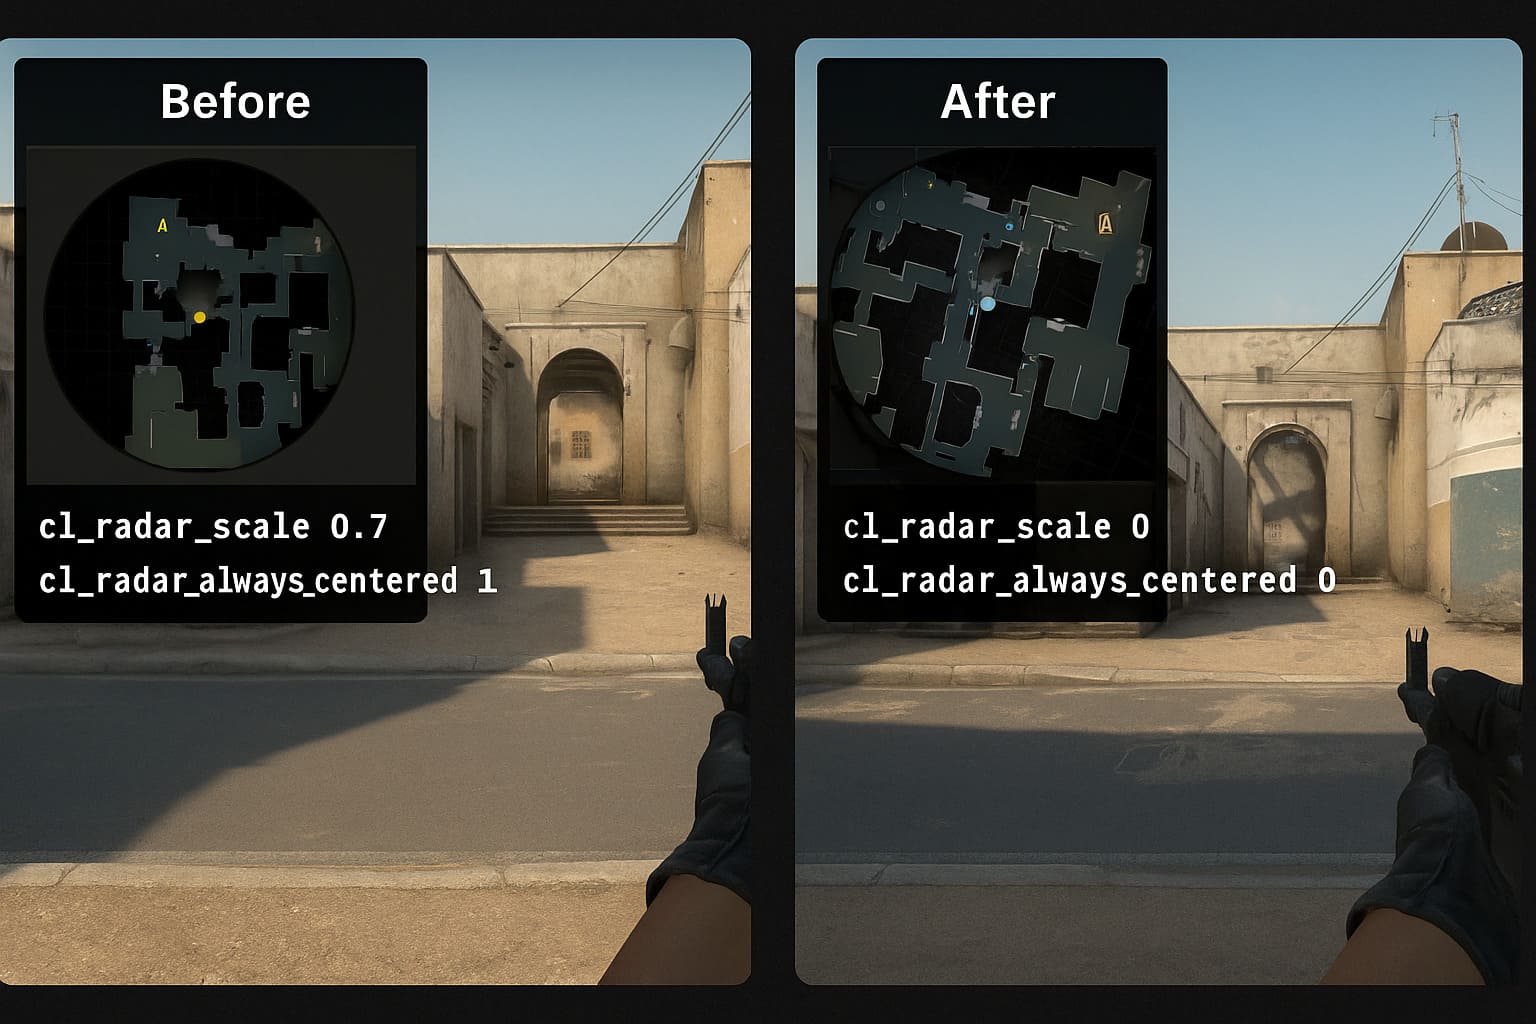
CS2 Radar Config
Radar settings optimize your minimap for maximum tactical information:
| Command | Description |
|---|---|
| cl_radar_always_centered "0" | Disables centering on character |
| cl_radar_scale "0.3" | Zoom level. Lower shows more map |
| cl_radar_rotate "1" | Enables rotation matching view |
| cl_radar_icon_scale_min "1" | Player icon size (max: 1) |
| cl_hud_radar_scale "1.15" | Overall radar size |
| cl_hud_bomb_under_radar "0" | Hides bomb icon when carrying |
The Most Popular CS2 Pros' Config Files
Professional CS2 players have transitioned their optimized configurations to Counter-Strike 2. These settings come from thousands of competitive matches and represent years of refinement.
Top CS2 Pro Configurations:
- s1mple - Legendary AWPer's precision settings optimized for flick shots
- m0NESY - Young prodigy's aggressive rifle config with high sensitivity
- ZywOo - French superstar's balanced approach to all weapons
- NiKo - Entry fragger's optimized viewmodel for spray control
- electronic - Tactical mastermind's utility binds and radar settings
💡 Pro Tip: Professional configs are starting points, not gospel! CS2's subtick system may require adjusting to match your personal playstyle and hardware.
Practice Config for CS2
How do you know when your autoexec hits perfection? Practice methodically! Testing new settings requires systematic evaluation. CS2's practice mode with subtick system provides the ideal environment for configuration testing.
Test crosshair settings with bots first. Fire at different distances, practice spray patterns, evaluate visibility. Once satisfied with bot testing, play 5-10 competitive games to validate settings under real pressure.
Sample practice commands:
sv_cheats 1
sv_infinite_ammo 1
mp_roundtime 60
mp_buytime 9999
bot_kick
With your perfectly configured autoexec, you're ready to dominate CS2 matches—whether practicing aim maps, competing for ranks, or exploring CS2 betting at PLG.BET!
Troubleshooting: Autoexec Not Loading in CS2
Couldn't exec autoexec in CS2? Source 2's new file structure sometimes causes confusion. Here's your troubleshooting guide.
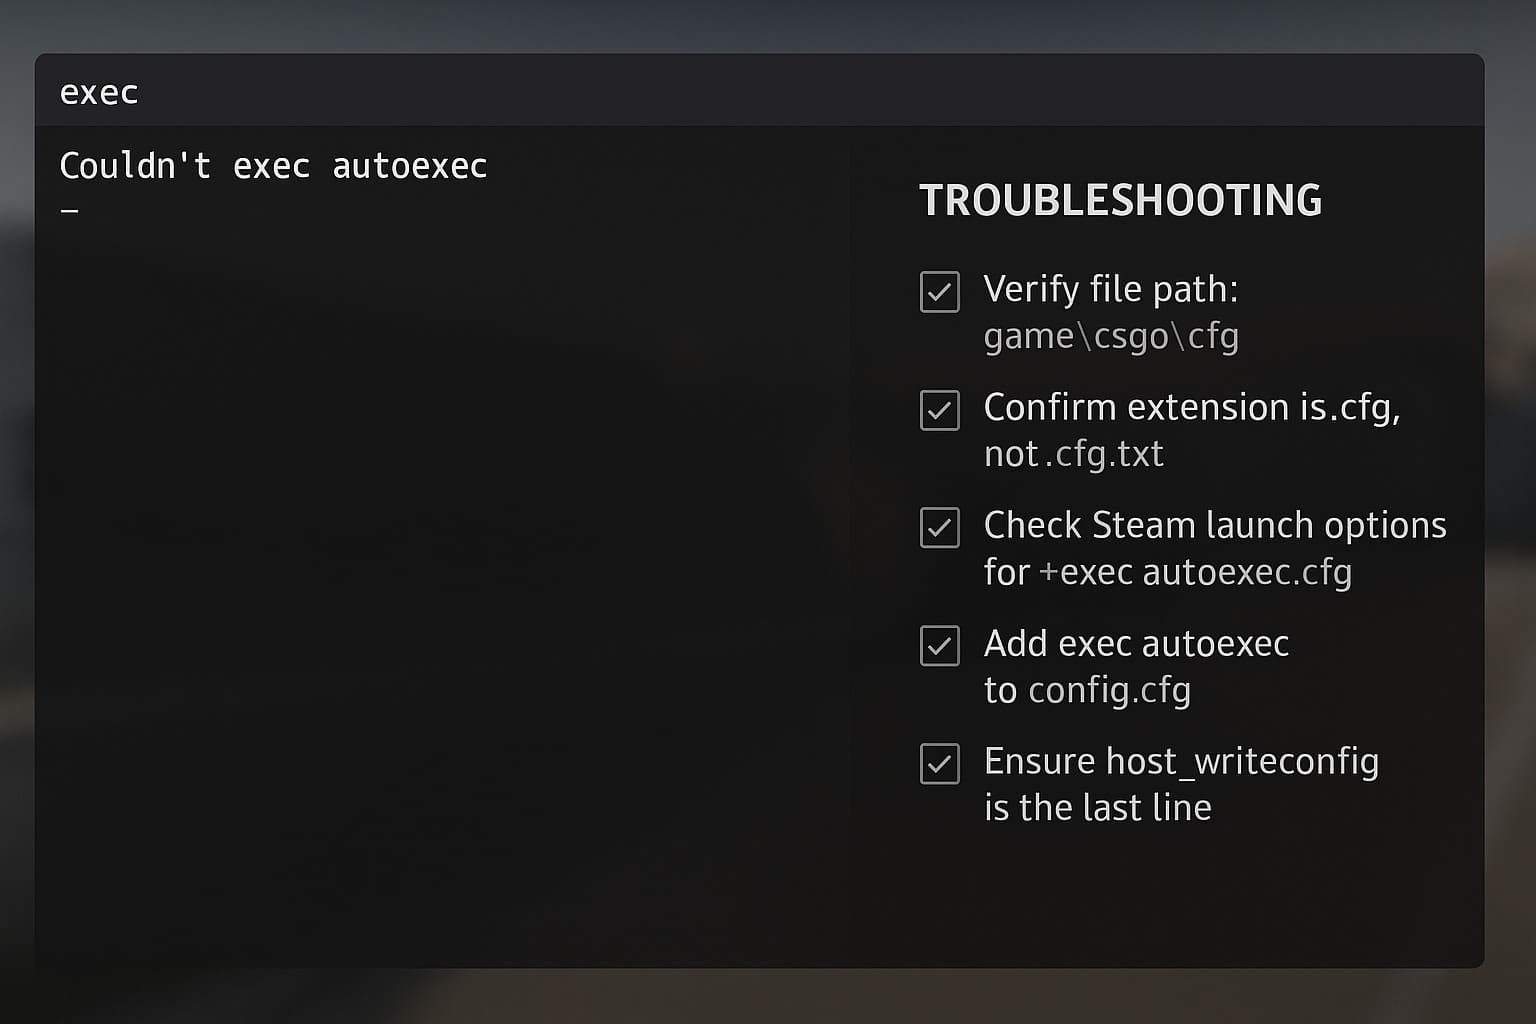
Common reasons autoexec fails:
- Wrong file location - Verify placement in \game\csgo\cfg\
- Incorrect file extension - Ensure file is autoexec.cfg, not autoexec.cfg.txt
- Missing launch option - Check Steam launch options include +exec autoexec.cfg
- Read-only attribute - Right-click autoexec.cfg, uncheck "Read-only"
- Missing host_writeconfig - Verify command exists on last line
Verification steps:
- Open developer console (press ~)
- Type exec autoexec manually to test
- Check console for error messages
- Add echo "Autoexec loaded!" to autoexec.cfg for confirmation
Manual execution workaround: Open console and type: exec autoexec
⚠️ Important: Double-check you're using the new \game\csgo\cfg\ path, not legacy CS:GO directories!
CS2-Specific Autoexec Commands
Source 2 brought new commands and modified existing ones. Understanding CS2 autoexec commands ensures your config leverages latest features.
New CS2 commands:
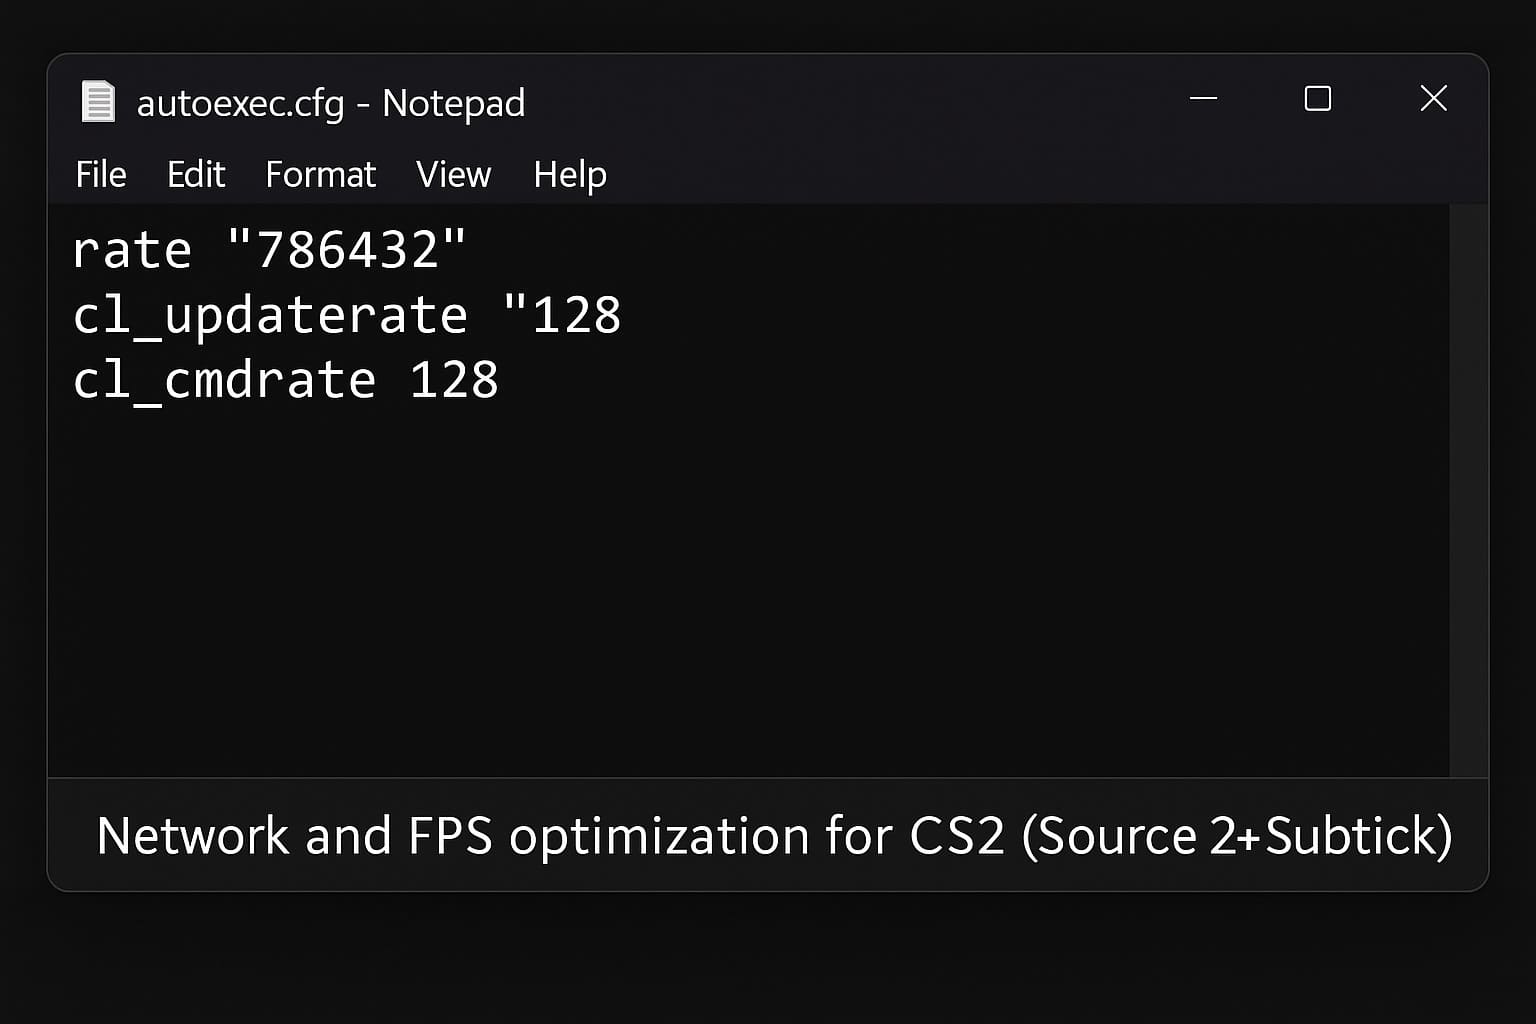
// Network optimization for subtick
rate "786432"
cl_updaterate "128"
cl_cmdrate "128"
cl_interp "0"
cl_interp_ratio "1"
// Performance optimization
fps_max "0"
fps_max_ui "120"
cl_showfps "1"
net_graph "1"
Performance commands for FPS boost:
r_dynamic "0"
mat_queue_mode "2"
cl_forcepreload "1"
Essential binds:
// Voice toggle
bind "mouse5" "toggle voice_enable 0 1"
// Buy binds
bind "kp_ins" "buy vesthelm; buy ak47; buy m4a1;"
🆕 New in CS2: The subtick system calculates actions between server ticks! For more help, check the official CS2 documentation.
Complete Example Autoexec:
// Network Settings
rate "786432"
cl_updaterate "128"
cl_cmdrate "128"
cl_interp "0"
cl_interp_ratio "1"
// Performance
fps_max "0"
fps_max_ui "120"
cl_showfps "1"
net_graph "1"
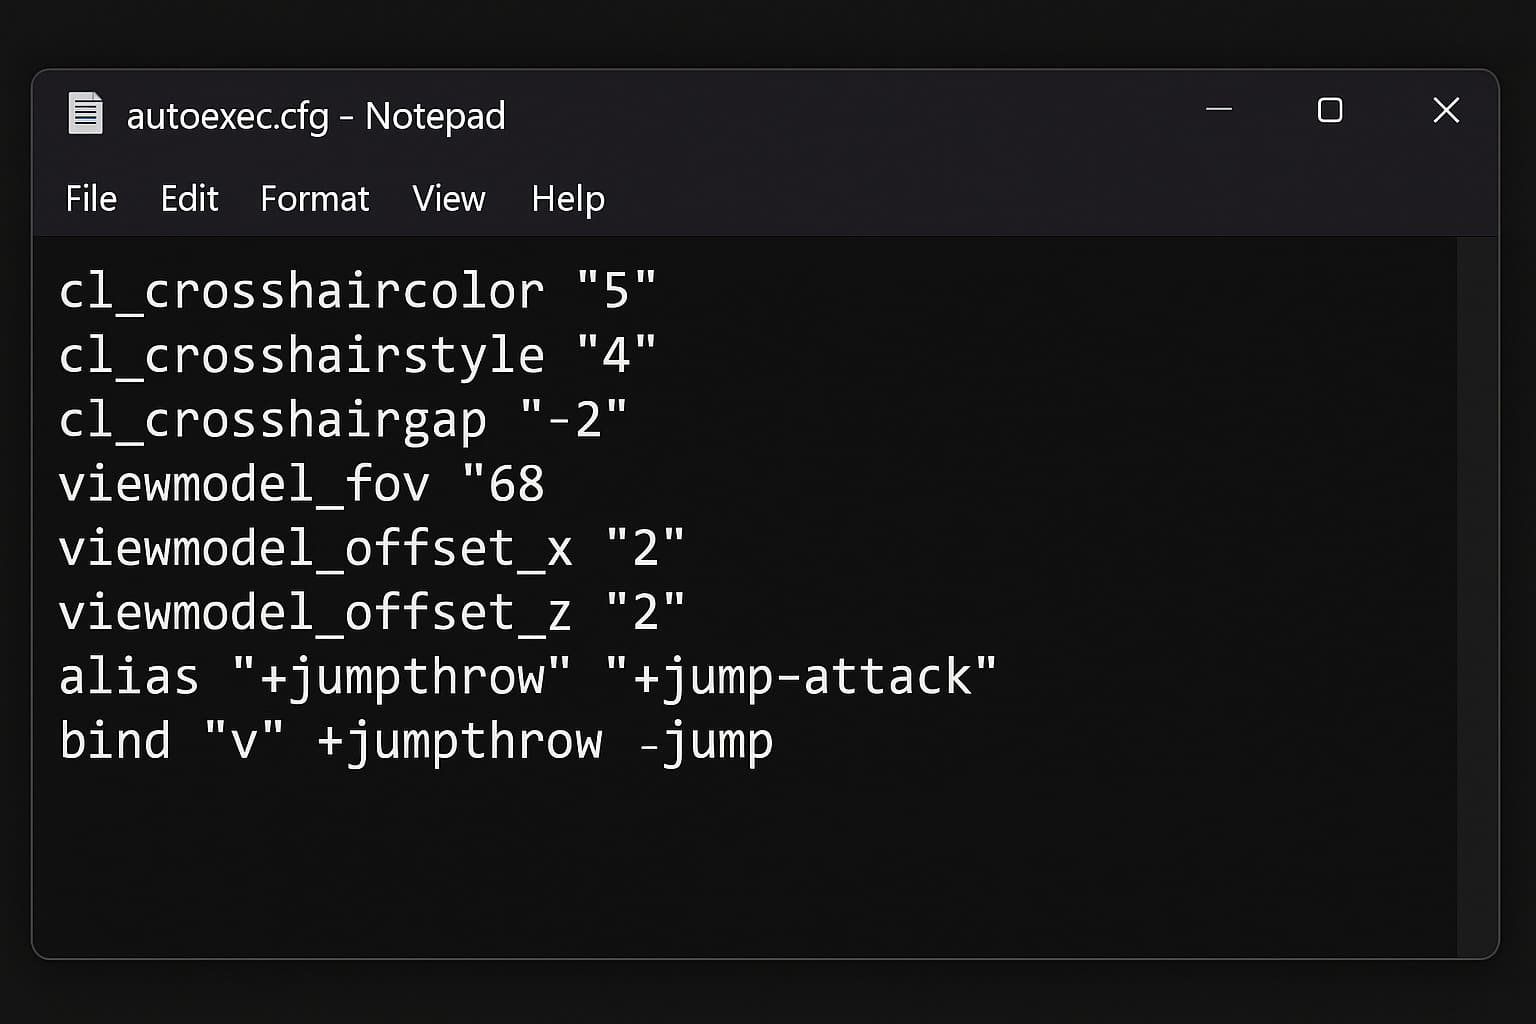
// Crosshair
cl_crosshaircolor "5"
cl_crosshairsize "2"
cl_crosshairstyle "4"
cl_crosshairgap "-2"
// Viewmodel
viewmodel_fov "68"
viewmodel_offset_x "2"
viewmodel_offset_y "-2"
viewmodel_offset_z "-2"
// Radar
cl_radar_scale "0.3"
cl_radar_always_centered "0"
// Binds
alias "+jumpthrow" "+jump;-attack"
alias "-jumpthrow" "-jump"
bind "v" "+jumpthrow"
bind "mouse5" "toggle voice_enable 0 1"
// Must be last line
host_writeconfig
Pros & Cons of Using Autoexec in CS2
Understanding benefits and limitations helps you decide if autoexec fits your CS2 journey.
| ✅ Pros | ❌ Cons |
| Settings persist through updates | Initial time investment required |
| Instant setup on multiple PCs | Learning curve for commands |
| Competitive advantage via consistency | Potential mistakes hurt performance |
| Complete customization control | Maintenance required for updates |
| Professional standard tool | Overkill for casual players |
| Performance optimization | Video settings need in-game adjustment |
| Backup security | Troubleshooting may be needed |
The verdict? For competitive CS2 players, autoexec is absolutely worth it!
Conclusion
Creating your CS2 autoexec takes under 5 minutes. Perfecting it? That's a continuous journey! Some players tweak configurations constantly throughout their Counter-Strike 2 career, adapting to new strategies and meta shifts.
This guide provided comprehensive information about autoexec in CS2, from Source 2 file locations to advanced console commands. The transition from CS:GO changed file paths and introduced the subtick system, but autoexec's value remains stronger than ever.Source 2 improvements mean your autoexec executes more reliably than before. Remember to maintain a config backup for safety! Check out our blog regularly for more CS2 guides. With your perfectly configured autoexec, you're ready to dominate—whether practicing, competing, or enjoying the action at PLG.BET.