The competitive landscape of Rainbow Six Siege demands strategic operator selection, and understanding the current r6 tier list is essential for ranked success. The 2025 meta has evolved significantly, with S-tier operators dominating professional play and ranked matches alike. This comprehensive siege operator tier list evaluates all operators based on utility, versatility, weapon effectiveness, and competitive viability. Whether you're searching for the best operators to climb ranked or understanding meta-relevant picks, this guide provides complete rankings backed by tournament statistics and professional insights. The tier classification system ranges from S-tier (elite meta picks) to E-tier (situational or underpowered), ensuring every player finds operators matching their playstyle and skill level.
Understanding Rainbow Six Siege Tier Rankings
The r6 operator tier list utilizes a systematic classification from S-tier to E-tier, ranking operators based on multiple performance metrics. This tier list meaning extends beyond simple strength assessments – it encompasses utility value, team composition synergy, skill floor requirements, and meta relevance across different competitive levels.
Tier Classification Breakdown:
- S-Tier: Elite operators with exceptional utility, high pick rates in professional play, and game-changing abilities that work across all maps and team compositions
- A-Tier: Strong meta-relevant operators with reliable utility and competitive viability, excellent for ranked progression
- B-Tier: Solid situational picks with specific strengths that shine in coordinated team strategies
- C-Tier: Niche operators requiring specific map knowledge or team coordination to maximize effectiveness
- D-Tier: Limited utility operators struggling in the current meta but viable in casual matches
- E-Tier: Underpowered operators needing buffs or reworks to compete with higher tiers
The ranking methodology evaluates operators through four primary attributes. Utility Impact measures an operator's ability to shape round outcomes through gadget deployment and strategic positioning. Versatility assesses effectiveness across different maps, sites, and team compositions, rewarding operators who adapt to various scenarios. Skill Floor examines accessibility for players at different skill levels, considering whether an operator requires extensive practice or provides immediate value. Meta Relevance analyzes competitive pick rates, ban rates, and professional tournament performance, ensuring rankings reflect actual competitive data rather than theoretical potential.
Professional tournament data, ranked statistics, and developer balance insights inform these classifications, ensuring the siege operator tier list reflects actual competitive performance. Understanding tier list meaning helps players make informed operator selections based on their current skill level, preferred playstyle, and team composition needs.
S-Tier Operators: The Elite Meta Picks
S-tier operators represent the pinnacle of competitive viability in Rainbow Six Siege. These best r6 operators combine exceptional utility, forgiving skill floors, and consistent performance across all maps and team compositions. Professional teams prioritize these essential operators in drafting phases, and ranked players achieve higher win rates through mastery of S-tier picks. The current 2025 meta heavily favors operators with information denial, area control, and versatile gadget applications that function independently of team coordination.

S-Tier Attackers
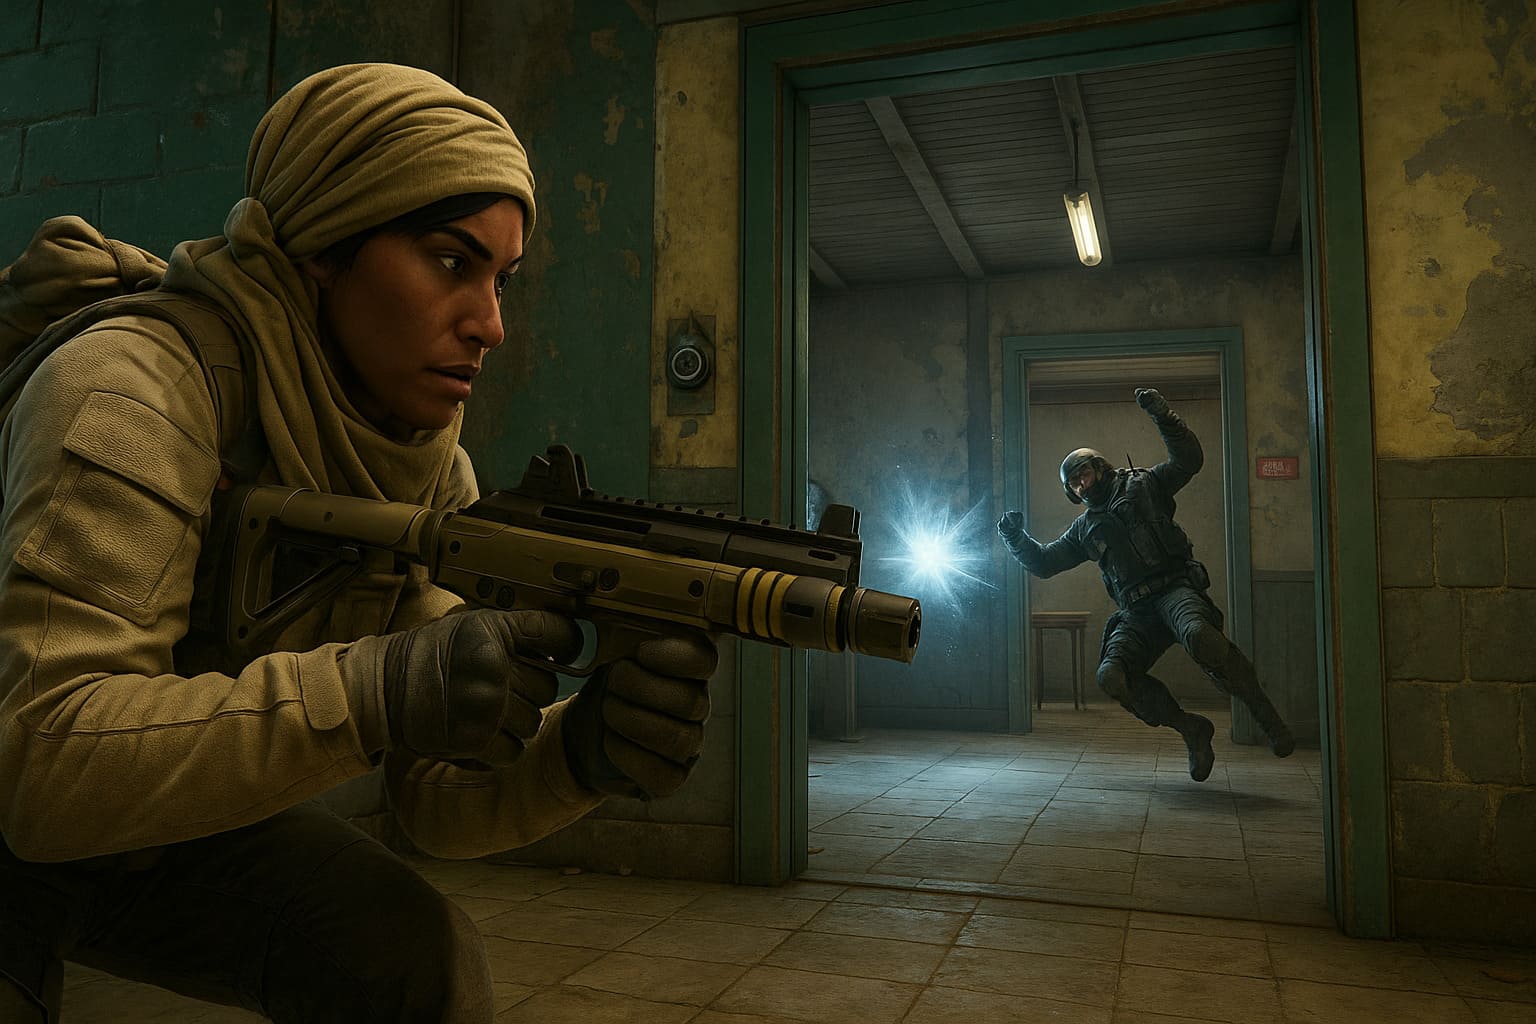
Nomad - The Flank Watch Specialist
Nomad dominates the r6 attackers tier list through her Airjab launcher system, providing unmatched flank security and post-plant denial. Her utility allows attackers to focus on objective execution without constant rotation checks, fundamentally changing how teams approach the site takes. Professional players consistently select Nomad for her ability to isolate defenders and create predictable engagement scenarios.
Key Strengths:
- Flank Denial Mastery: Airjabs cover critical rotation points, forcing defenders into predictable positions
- Versatile Application: Effective on every map and site, with no hard counters to her utility
- Excellent Weapon Arsenal: AK-74M and ARX200 provide reliable fragging power at all ranges
- Low Skill Floor: Straightforward gadget deployment with immediate tactical value
The Airjab system functions through three deployable launchers that stick to surfaces and trigger when defenders pass nearby, knocking them back and disorienting them temporarily.
The low skill floor makes Nomad accessible to players at all levels – straightforward gadget deployment delivers immediate tactical value without requiring extensive map knowledge or team coordination. Optimal loadout selection typically includes the AK-74M with Flash Hider and ACOG scope, combined with Breach Charges for vertical play options. Position Airjabs on entry doorways post-plant or on rotation paths during site execution, conserving all three charges for crucial moments rather than early-round deployment.
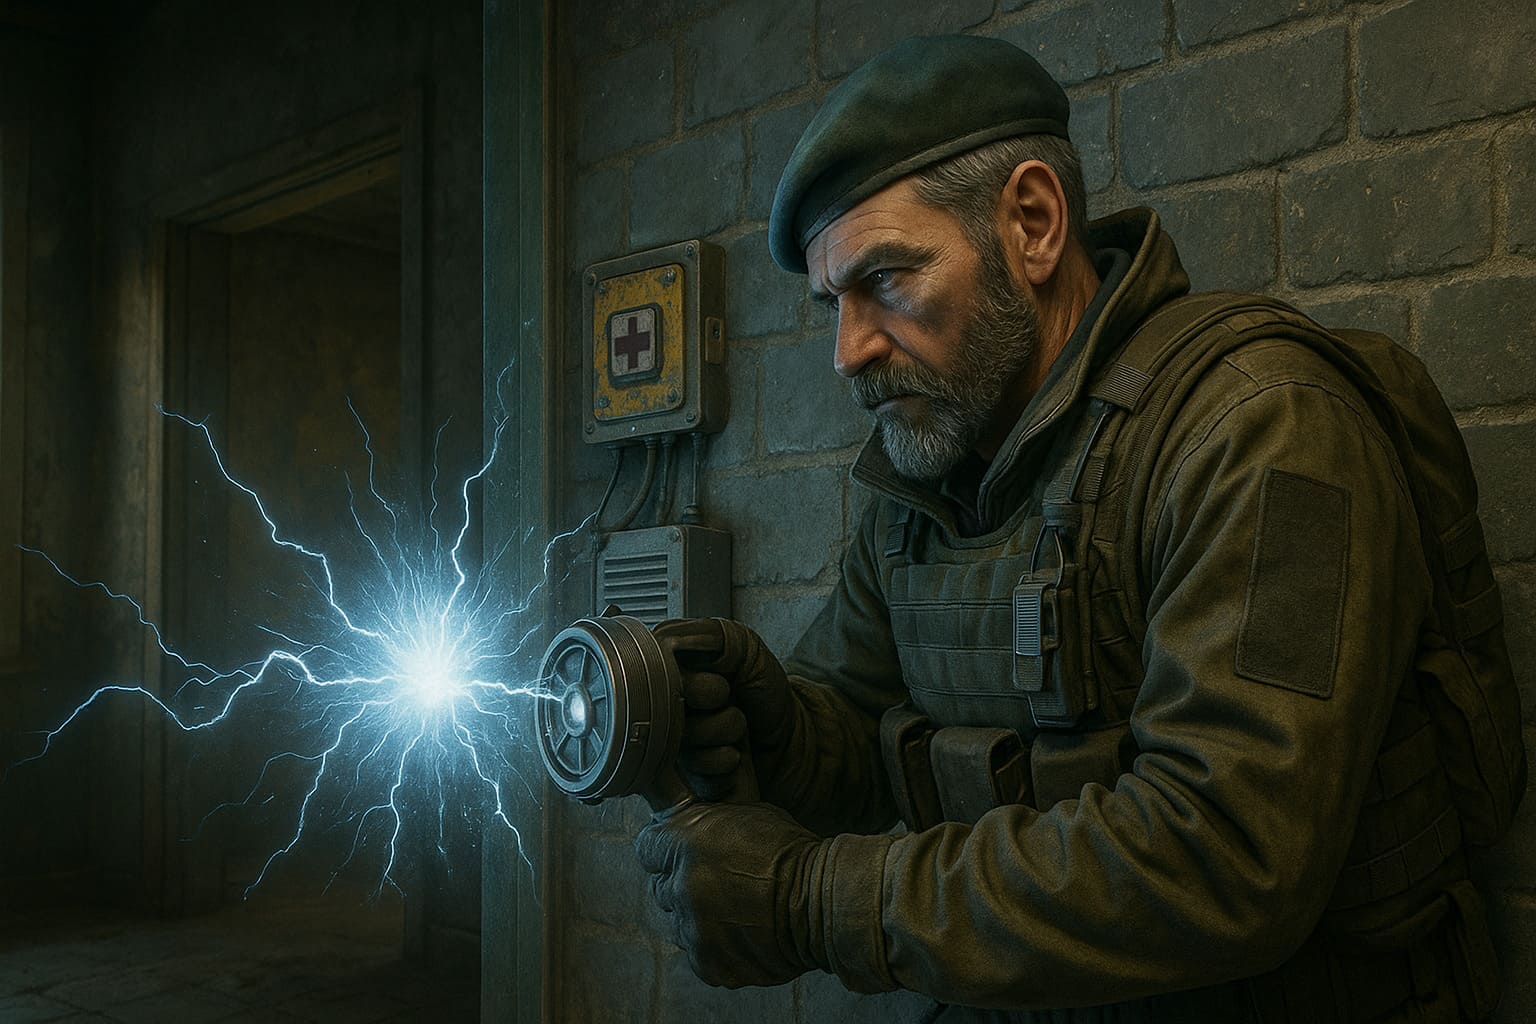
Thatcher - The Electronics Destroyer
Thatcher maintains S-tier status as the most reliable anti-electronics operator in the best attackers r6 category. His EMP grenades disable all defender gadgets in a massive radius, enabling hard breaches and clearing crucial utility obstacles. Despite Ubisoft's attempts to introduce alternatives like Twitch, IQ, and Brava, Thatcher's consistency and ease of use keep him at the meta's forefront.
Tactical Advantages:
- Guaranteed Utility Clear: EMP grenades destroy or disable electronics without line-of-sight requirements
- Hard Breacher Synergy: Essential partner for Thermite and Hibana strategies
- Information Denial: Disables cameras and defender information tools effortlessly
- Competitive Staple: Highest ban rate in professional play confirms meta dominance
The guaranteed utility clearance of EMP grenades destroys or disables electronics without line-of-sight requirements, making Thatcher irreplaceable for coordinated hard breach strategies.
Operational strategy requires coordinating EMP throws with hard breacher timing, destroying Bandit batteries and Mute jammers simultaneously to create breach windows. Save one EMP for post-plant scenarios to disable defender retake utility like Smoke's Remote Gas Grenades or Maestro's Evil Eye cameras. The L85A2 rifle provides excellent accuracy for holding angles after utility deployment, with low recoil supporting precision gameplay.
Zero - The Information Warfare Expert
Sam Fisher brings unparalleled information gathering through his Argus Camera system, earning his position among the best r6 operators. Zero's cameras pierce soft surfaces, providing real-time intel while maintaining combat effectiveness through superior weapon loadouts. Professional teams leverage Zero for coordinated executes and post-plant information control, with his versatility making him valuable across all competitive scenarios.
The unique piercing cameras penetrate soft walls, gathering intel without exposing player positions to defender crossfire. Each Argus Camera fires a single laser shot, destroying defender gadgets from unexpected angles and providing alternative utility clearance when Thatcher receives bans. Elite weaponry options include the SC3000K and MP7, both providing incredible fragging potential with minimal recoil and high damage output. Flexible deployment supports both site executes and post-plant scenarios, with four cameras allowing multiple information gathering positions throughout rounds.
Deployment tactics include placing Argus Cameras above common defender positions or in reinforced wall corners for protected intel gathering. Use camera lasers to destroy shield deployments, barbed wire, or hanging gadgets like Bandit batteries and Kaid Electroclaws. Zero excels in late-round clutch situations where information advantages determine outcomes, with cameras providing complete site awareness during critical moments.
S-Tier Defenders
Jäger - The Projectile Denial King
Jäger remains the undisputed champion of the best defenders r6 tier, with his Active Defense System (ADS) intercepting attacker projectiles and protecting critical defensive setups. Despite multiple nerfs attempting to reduce his pick rate – including armor rating reductions and weapon recoil increases – Jäger's combination of essential utility and exceptional weapon performance maintains his S-tier classification. Professional teams almost universally include Jäger in defensive lineups, highlighting his irreplaceable role in competitive compositions.
Defensive Superiority:
- Utility Protection: Three ADS devices intercept grenades, flashbangs, and smoke grenades
- Roaming Potential: Three-speed rating enables aggressive map control and vertical play
- 416-C Carbine Dominance: One of the best defender weapons with minimal recoil
- Versatile Positioning: Effective as both site anchor and roaming operator
Positioning strategy requires deploying ADS devices near reinforced walls to protect against Hibana pellets and above common plant positions to deny smoke grenade executes. Jäger's three-speed rating allows early map control to gather information followed by ADS deployment before retreating to roam positions. The 416-C carbine with Holographic or Reflex sight provides consistent fragging power, with the weapon's natural accuracy supporting aggressive peeking and long-angle holding.
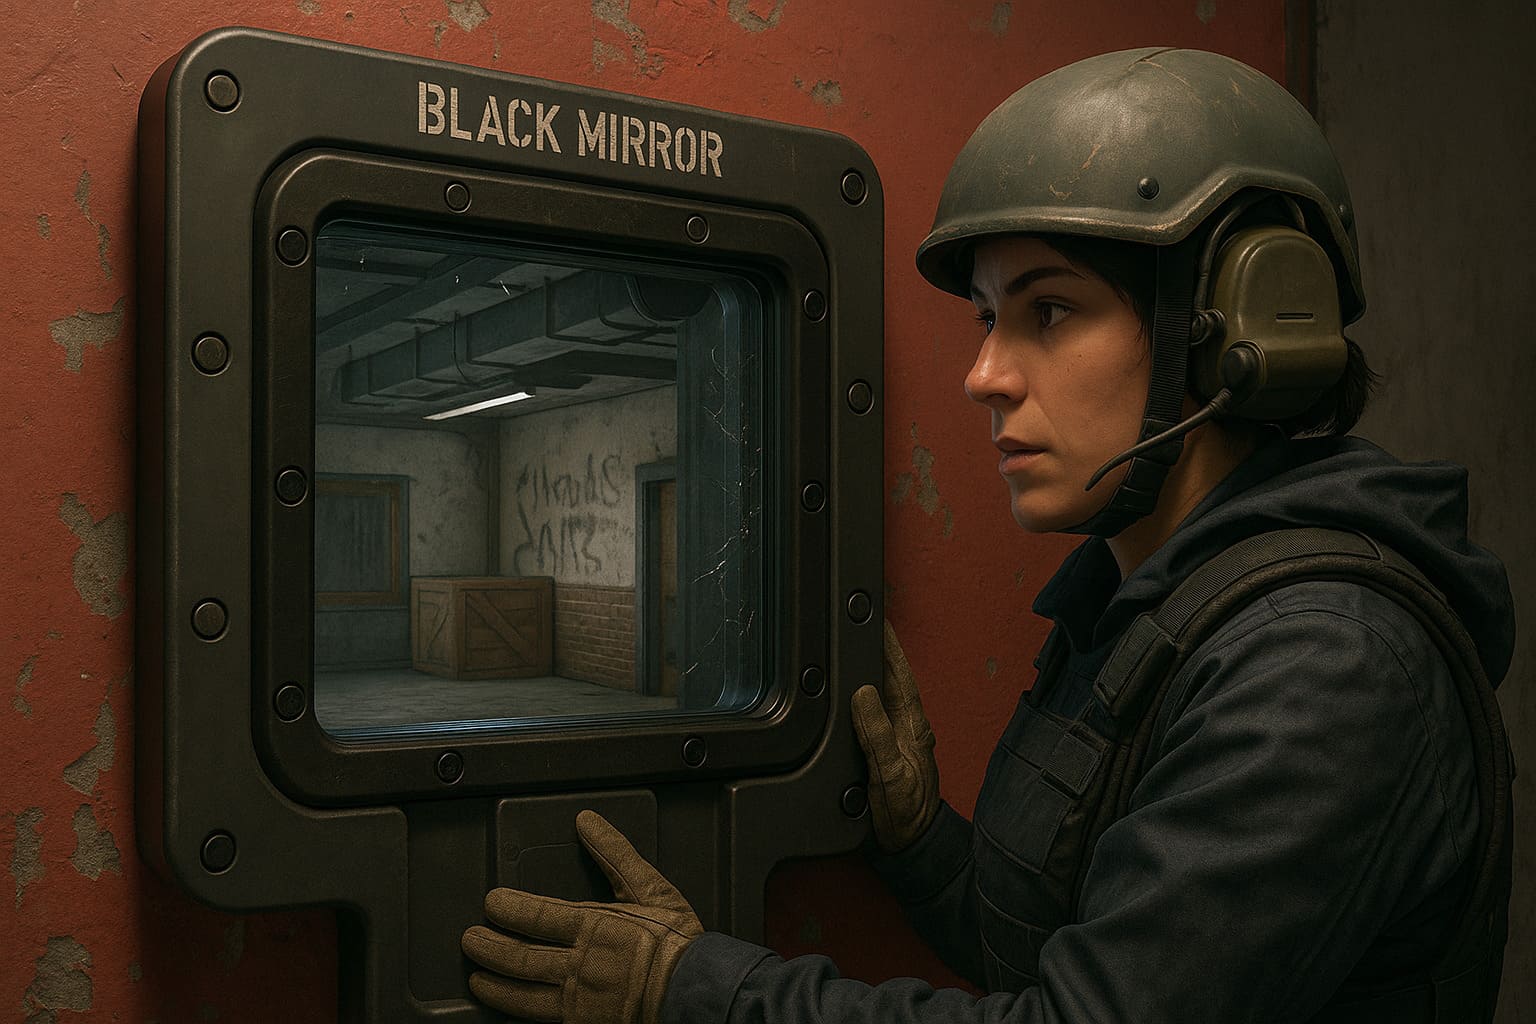
Mira - The Strategic Site Controller
Mira revolutionizes defender site control through her Black Mirror windows, creating one-way visibility advantage points that fundamentally alter attacker approach strategies. The best defense operator 2025 meta heavily favors information-based utility, and Mira's mirrors provide unmatched intel gathering while enabling defender crossfires and rotation control. Professional teams consider Mira essential on reinforcement-heavy sites, where mirror placement creates insurmountable defensive advantages when properly coordinated.
Strategic dominance comes from one-way vision advantage – Black Mirrors allow defenders to gather information without exposure risk, watching attacker movements while remaining completely protected. Crossfire creation represents Mira's primary tactical value, as mirror placement forces attackers into predicted lines of fire where teammates can capitalize on exposed positions. The psychological pressure of Mira windows forces attackers to respect mirror angles, slowing execute timing and burning valuable round time. Expert-level impact requires extensive map knowledge and team coordination, with mirror placement determining entire site defense strategies.
Mirror placement principles include positioning mirrors at chokepoint angles or reinforcement seams, creating crossfire opportunities with teammates holding complementary angles. Place mirrors at defensive crouch height to enable superior angle holding while maintaining cover from attacker fire. Advanced players use destructible mirror strategy, opening windows during critical moments to catch attackers off-guard with unexpected angles. Mira synergizes perfectly with Kaid or Bandit for reinforcement protection, preventing hard breach destruction of mirror walls. The Vector .45 ACP submachine gun provides excellent close-range stopping power, ideal for punishing attackers entering through doorways adjacent to mirror positions.
Aruni - The Area Denial Specialist
Aruni brings unparalleled area denial through her Surya Gates, earning her position among meta operators r6. These laser gates damage attackers passing through while providing information pings, forcing utility expenditure and slowing attacker momentum. Her recent buffs solidified Aruni's S-tier status, combining excellent utility with strong fragging potential through her prosthetic arm's melee destruction capability.
Defensive excellence stems from zero-cost utility – Surya Gates don't require gadget inventory like barbed wire or deployable shields, providing persistent area denial without sacrificing secondary gadget utility. Information gathering occurs when gates are destroyed or traversed, pinging the defender team and alerting them to attacker positions and entry timing. Vertical control represents a unique advantage, as gates placed on hatches prevent vertical pressure without requiring reinforcement pool expenditure. The melee destruction ability allows Aruni to open rotations and lines of sight without dedicated secondary gadgets, providing unmatched site flexibility.
Gate deployment tactics include positioning Surya Gates on common entry doorways, forcing attackers to expend grenades or take 40 damage per passage. Place gates on critical hatches connecting floors, preventing vertical pressure without using reinforcements that might be needed elsewhere. Aruni's P10 RONI submachine gun provides excellent range for a defender weapon, enabling effective angle holding on long sightlines. Her unique playstyle combines aggressive area denial with reactive site adaptation, making her invaluable across all defensive strategies.

S-Tier Operators
A-Tier Operators: Meta-Relevant Choices
A-tier operators deliver consistent competitive performance while requiring slightly more situational awareness or team coordination than S-tier picks. These strong picks excel in ranked progression and competitive play, offering reliable utility with minimal drawbacks. The A-tier operators balance accessibility with effectiveness, making them excellent choices for players developing their operator pools beyond essential S-tier selections.
A-Tier Attackers
Ace - The Hard Breach Innovation
Ace modernizes the hard breacher role through his SELMA Aqua Breacher devices, providing more flexible wall destruction than traditional operators like Thermite. His ability to throw breaching devices enables safer deployment from protected positions, avoiding the close-range exposure that makes Thermite vulnerable to breach denial strategies. The excellent weapon loadout ensures fragging potential beyond utility deployment, with the AK-12 providing arguably the best attacking rifle in Rainbow Six Siege. Professional teams frequently select Ace when Thermite receives bans or when coordinated anti-breach defense from Bandit tricking or Kaid positioning is expected.
The throwable deployment system allows SELMA devices to be launched from safe positions, forcing defenders to expose themselves for destruction attempts rather than safely shooting Thermite charges during placement. Sequential destruction creates tactical flexibility – three devices can create large openings similar to Thermite or be distributed across multiple walls for diverse entry points. Smoke grenade synergy provides self-sufficient plant execution capability, allowing Ace to breach walls and smoke plant positions without relying on teammate coordination.
Operational approach involves deploying SELMA devices from protected angles, coordinating with Thatcher or Kali for anti-electronics support before device activation. Ace works exceptionally well on reinforcement-heavy sites like Consulate basement or Bank basement, where multiple breach points provide tactical flexibility and force defenders to split attention. The AK-12 rifle features minimal recoil with high damage output, enabling Ace to confidently take gunfights after utility expenditure.
Hibana - The Precise Breacher
Hibana maintains strong A-tier positioning through her X-KAIROS pellet launcher, creating multiple small openings or sight lines through reinforced surfaces. Her versatility extends beyond traditional hard breaching – professional players use pellet distribution for creative angle creation and hatch destruction from safe distances. The Type-89 rifle provides excellent fragging potential, ensuring Hibana remains competitive even after utility expenditure. Three-speed mobility enables quick rotation and aggressive entry fragging capabilities, making Hibana valuable beyond her hard breach role.
Ranged deployment allows X-KAIROS to fire from any distance, enabling hatch destruction without exposure to defender positions below. Flexible opening sizes emerge from tactical pellet distribution – concentrate all pellets for vault-size openings or spread across multiple locations for diverse sight lines and pressure points. The reliable weaponry of Type-89 combines high damage with manageable recoil patterns, supporting aggressive play after gadget deployment.
Deployment strategy emphasizes saving pellet charges for critical moments rather than early-round expenditure on non-essential walls. Hibana excels at hatch destruction on multi-level sites, opening vertical pressure lanes from safe positions above defender locations. Coordinate pellet timing with smoke deployment for protected plant execution, using Hibana's speed to quickly transition from breach to plant support.
Brava and Finka round out A-tier attackers with unique utility contributions. Brava introduces innovative utility hacking through her Kludge Drone, turning defender gadgets against their team and providing alternative electronics clearance when Thatcher receives bans. Finka's Adrenal Surge ability temporarily enhances all attacker team members, providing recoil reduction, health boost, and revival capability that synergizes perfectly with coordinated site executes.
A-Tier Defenders
Azami - The On-Demand Cover Creator
Azami revolutionizes defensive positioning through her Kiba Barrier kunai, creating instant cover and rotation blocks that enable reactive adaptation to attacker strategies. This dynamic utility allows defenders to fill unexpected gaps or reinforce compromised positions mid-round, providing flexibility that static defensive setups cannot match. Professional players leverage Azami for creative site adaptations and clutch scenario cover creation, with her five kunai allowing multiple defensive adjustments throughout rounds.
Instant cover creation deploys bulletproof surfaces within seconds, providing immediate protection during attacker pushes or clutch situations. Rotation control capabilities allow barriers to block attacker movement through destroyed walls or open areas, forcing utility expenditure or repositioning. Vertical denial emerges from kunai sealing opened hatches or floor breaches, preventing vertical pressure that would otherwise compromise defensive positions. The flexible application of five kunai supports multiple defensive adaptations, from early-round setup adjustments to late-round clutch covers.
Barrier deployment priorities emphasize saving kunai for reactive plays rather than pre-round setup that might become irrelevant. Seal opened walls during attacker pushes, forcing them to reposition or expend precious utility on barrier destruction. Block critical sight lines during plant scenarios, creating cover for aggressive retakes without exposing defender positions. Azami's 9x19VSN SMG provides excellent close-range firepower, supporting aggressive defensive plays enabled by kunai positioning.
Bandit - The Electronics Denial Expert
Bandit maintains solid A-tier positioning through his Shock Wire batteries, electrifying reinforcements and barbed wire to deny attacker utility and movement. The classic "Bandit trick" technique – manually placing and retrieving batteries to counter hard breach attempts – requires skill but provides exceptional value when executed properly. His MP7 remains one of the best defender weapons with minimal recoil and high rate of fire, ensuring fragging potential beyond utility deployment. Professional players still value Bandit despite competition from Kaid, particularly on sites requiring active battery juggling rather than set-and-forget electrification.
Reinforcement protection through electrified batteries prevents Thermite and Hibana breaches, forcing attackers to expend Thatcher EMPs or alternative utility clearance before breach attempts succeed. Barbed wire synergy creates lethal obstacles, as electrified wire damages attackers while slowing movement through critical chokepoints. Battery juggling enables skilled players to manually counter hard breach attempts through reactive battery placement, waiting for breach gadget deployment before electrifying walls.
Battery management strategy involves positioning batteries on critical reinforcements, prioritizing walls enabling main entry routes to objective sites. Practice "Bandit trick" timing against hard breachers, developing the reflexes to hear breach gadget placement and react with immediate battery deployment. Use remaining batteries on barbed wire covering rotation paths or plant positions, creating hazardous zones attackers must clear before safe movement.
Echo and Fenrir complete A-tier defenders with specialized utility. Echo provides dual-purpose capability through Yokai drones that gather information while denying attacker plant attempts with sonic burst interruptions. Fenrir introduces unique psychological pressure through F-NATT Dread Mines, creating area denial zones that trigger fear effects and reveal attacker positions.
Complete B-E Tier Rankings
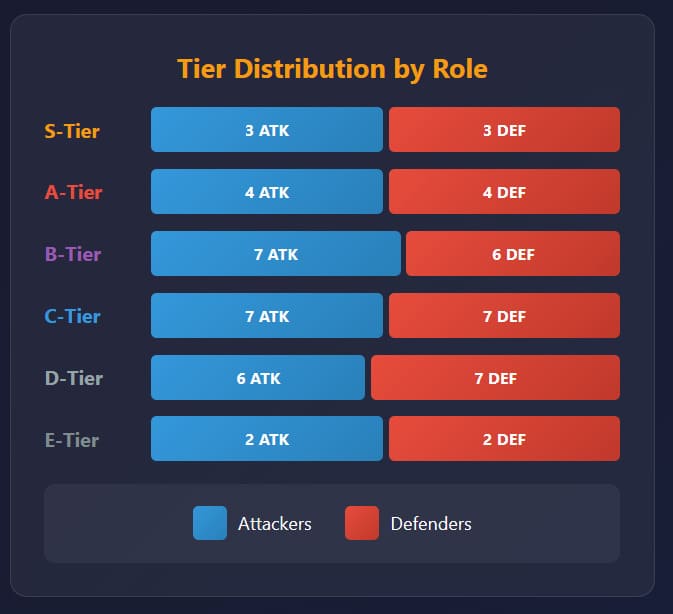
The complete tier list extends beyond S and A-tier operators, encompassing all operators ranked across the competitive spectrum.
B-tier includes solid situational picks like Thermite, Iana, Buck, Sledge, Lesion, Smoke, and Valkyrie – operators excelling in specific scenarios or team compositions but lacking universal applicability. These operators require coordination or map-specific knowledge for maximum effectiveness, rewarding players who invest time in mastering their nuances.
C-tier operators fill niche specialist roles with operators like Maverick, Glaz, Dokkaebi, Lion, Rook, Frost, and Vigil. These selections shine on particular maps or against specific strategies but struggle with consistency across the competitive landscape. Maverick provides quiet reinforcement breaching that bypasses anti-breach utility but requires precise execution and exposure risk. Frost's Welcome Mat traps punish careless attacker movement but become increasingly predictable at higher skill levels.
D-tier represents operators with limited meta viability including Blitz, Blackbeard, Nokk, Castle, Caveira, and Warden. These situational picks occasionally work in casual matches but face significant challenges in ranked progression. Blackbeard's Rifle Shield has been nerfed so severely that minimal protection comes with substantial mobility penalties, making him nearly unviable in current meta. Castle's Armor Panels often hinder defender rotations more than helping defensive strategy, creating frustration for coordinated teams.
E-tier operators desperately need developer attention through significant buffs or complete ability reworks. Sens, Kali, Clash, and Oryx provide minimal competitive value despite occasional niche applications. Sens's R.O.U. Projector System creates light walls blocking vision but is easily countered and has limited practical application. Kali's CSRX 300 sniper rifle demands an extremely high skill floor for inconsistent impact, making her one of the most difficult operators to justify selecting in competitive matches.
S-Tier Operators
| Operator | Utility Score | Pick Rate |
|---|---|---|
| Nomad | 95/100 | 65-75% |
| Thatcher | 98/100 | 70%+ (90%+ ban rate) |
| Zero | 93/100 | 60-70% |
| Jäger | 97/100 | 85%+ |
| Mira | 96/100 | 70-80% |
| Aruni | 94/100 | 65-75% |
A-Tier Operators
| Operator | Utility Score | Pick Rate |
|---|---|---|
| Ace | 88/100 | 60-65% |
| Hibana | 86/100 | 55-65% |
| Brava | 85/100 | 45-55% |
| Finka | 84/100 | 50-60% |
| Azami | 89/100 | 60-70% |
| Bandit | 87/100 | 55-65% |
| Echo | 86/100 | 50-60% |
| Fenrir | 85/100 | 45-55% |
B-Tier Operators
| Operator | Utility Score | Pick Rate |
|---|---|---|
| Thermite | 78/100 | 40-50% |
| Iana | 76/100 | 35-45% |
| Buck | 77/100 | 40-50% |
| Sledge | 75/100 | 35-45% |
| Flores | 74/100 | 30-40% |
| Capitão | 73/100 | 30-40% |
| Fuze | 72/100 | 25-35% |
| Lesion | 79/100 | 45-55% |
| Smoke | 80/100 | 45-55% |
| Kapkan | 75/100 | 35-45% |
| Valkyrie | 78/100 | 40-50% |
| Maestro | 77/100 | 40-50% |
| Goyo | 74/100 | 30-40% |
C-Tier Operators
| Operator | Utility Score | Pick Rate |
|---|---|---|
| Maverick | 68/100 | 20-30% |
| Glaz | 65/100 | 15-25% |
| Dokkaebi | 67/100 | 20-30% |
| Lion | 66/100 | 18-28% |
| Gridlock | 64/100 | 15-25% |
| Montagne | 69/100 | 22-32% |
| Amaru | 63/100 | 15-25% |
| Rook | 70/100 | 25-35% |
| Frost | 67/100 | 20-30% |
| Pulse | 68/100 | 22-32% |
| Vigil | 66/100 | 20-30% |
| Ela | 65/100 | 18-28% |
| Alibi | 64/100 | 15-25% |
| Wamai | 69/100 | 22-32% |
D-Tier Operators
| Operator | Utility Score | Pick Rate |
|---|---|---|
| Blitz | 52/100 | 8-15% |
| Blackbeard | 48/100 | 5-12% |
| Jackal | 55/100 | 10-18% |
| Nokk | 51/100 | 8-15% |
| Osa | 54/100 | 10-18% |
| Grim | 53/100 | 9-16% |
| Tachanka | 50/100 | 7-14% |
| Castle | 49/100 | 6-13% |
| Caveira | 52/100 | 8-15% |
| Warden | 47/100 | 5-12% |
| Melusi | 54/100 | 10-18% |
| Thunderbird | 53/100 | 9-16% |
| Tubarão | 51/100 | 8-15% |
E-Tier Operators
| Operator | Utility Score | Pick Rate |
|---|---|---|
| Sens | 38/100 | 3-8% |
| Kali | 42/100 | 4-9% |
| Clash | 35/100 | 2-6% |
| Oryx | 40/100 | 3-8% |
2025 Meta Analysis & Seasonal Impact
The r6 meta 2025 emphasizes information control, utility management, and adaptive positioning over pure fragging power. Recent seasonal changes introduced operator buffs and nerfs reshaping tier rankings, with developers focusing on reducing pick rate disparities between operators.
Current Meta Trends:
- Utility Meta Dominance: Teams prioritize operators with multiple utility functions over specialists
- Information Warfare: Surveillance capabilities determine round outcomes in professional play
- Anti-Projectile Priority: Jäger and Wamai remain crucial despite nerfs
- Plant Denial Emphasis: Operators interrupting plant attempts see increased selection
Current meta trends favor utility meta dominance, where teams prioritize operators with multiple utility functions rather than narrow specialists. Information warfare capabilities determine round outcomes in professional play, with surveillance and counter-surveillance creating significant competitive advantages.
Anti-projectile priority remains critical despite nerfs to Jäger and Wamai, highlighting how essential projectile denial remains for protecting defensive setups. Plant denial emphasis has increased, with operators capable of interrupting plant attempts like Echo, Smoke, and Goyo seeing elevated competitive selection rates. The competitive scene shifted following the latest seasonal patch, which adjusted weapon recoil patterns for several attackers and modified gadget deployment times for key defenders.
Professional teams adapted quickly to seasonal changes, with tournament statistics tracked on esports platforms like plg.bet revealing preference shifts toward operators enabling flexible site adaptation. The seasonal evolution impacts tier rankings continuously, requiring players to stay updated on operator adjustments and meta shifts. Recent balance changes buffed Aruni's Surya Gate durability while nerfing Jäger's weapon recoil, attempting to diversify defensive roster selections without eliminating his utility value.
Attacker changes focused on improving underperforming hard breachers and information-gathering operators, with buffs to operators like Iana and Buck attempting to increase pick rate diversity. Despite developer efforts, S-tier operators maintained dominance through fundamental utility value that transcends numerical adjustments. The meta adaptation period following patches creates temporary tier fluctuations before the competitive community establishes optimal strategies and counter-strategies.
Role-Based Tier Analysis
Understanding operator effectiveness through strategic roles provides deeper insight than simple tier rankings alone. Different team compositions require specific roles filled by appropriate operators, creating tier variations based on team needs and strategic approaches.
Entry Fragger Rankings:
Entry fragger operators prioritize gunfight advantages and aggressive positioning, with the best entry fraggers combining excellent weapons with abilities supporting aggressive pushes:
- Ash (A-Tier): Three-speed rating and R4-C rifle enable fast-paced aggressive entries
- Zofia (A-Tier): KS79 Lifeline provides breach capability with self-revive insurance
- IQ (B-Tier): Electronics detection supports entry fragging with excellent weapon options
- Iana (B-Tier): Gemini Replicator scouts entry paths before commitment
Hard Breacher Tier:
Hard breacher effectiveness varies significantly based on coordination requirements and deployment safety:
- Ace (A-Tier): Throwable deployment provides flexibility and safety from protected positions
- Hibana (A-Tier): Ranged pellet launcher offers versatile opening creation without exposure risk
- Thermite (B-Tier): Reliable large openings require close-range exposure
- Maverick (C-Tier): Quiet breach bypasses counter-utility but demands precision
Support operators provide team-wide utility and information advantages, with attackers like Zero, Iana, and Finka delivering consistent support value through information gathering and team enhancements. Defender support includes Valkyrie, Echo, and Maestro, who offer surveillance and intelligence crucial for coordinated defensive strategies. Role-based operator selection considers team composition gaps and strategic objectives beyond individual operator strength, ensuring balanced teams include hard breach capability, projectile destruction, information gathering, and fragging potential.
Weapon Tier Integration
Operator effectiveness intertwines with weapon performance – superior firearms enable consistent fragging regardless of utility strength. Understanding weapon-operator synergies provides a complete competitive perspective beyond ability evaluation alone.
Top-Tier Attacker Weapons:
- AK-12 (Ace, Fuze): Minimal recoil with exceptional damage - the best gun R6 offers
- R4-C (Ash): Highest rate of fire with manageable recoil for aggressive plays
- Type-89 (Hibana): Excellent damage-per-second with reasonable recoil patterns
- 416-C (Jäger): Best defender weapon matching top attacker firearms
- MP7 (Zero, Bandit): Incredible versatility at all engagement ranges
Superior weaponry maintains operator viability through meta shifts. Even if gadget nerfs reduce utility value, operators with excellent firearms retain competitive positioning through fragging potential alone. Conversely, operators like Kali suffer from weapon limitations – the CSRX 300 sniper rifle creates vulnerability in close-quarters engagements.
Tier rankings consider weapon performance as equal importance to gadget utility, acknowledging that operators must survive gunfights to deliver their utility value.
Professional Play Validation
Tournament data from competitive platforms like plg.bet and professional insights validate tier classifications through competitive performance. Recent championship data reveals compelling statistical patterns supporting tier rankings.
S-tier operators average 70%+ pick rates in professional matches, confirming their universal applicability. Jäger maintains 85%+ defensive pick rate despite multiple nerfs, while Thatcher faces 90%+ ban rate – opponents deny him rather than develop counter-strategies. Zero's pick rate climbed from C-tier levels to S-tier meta staple through professional adoption.
Professional teams invest significant practice developing operator-specific strategies. Tournament statistics validate rankings objectively, as coordinated teams naturally gravitate toward operators delivering maximum competitive value. Top-tier players emphasize that operator selection must match team composition and strategic approach rather than blindly following tier lists. Operator synergy – selecting operators whose abilities complement teammates – creates multiplicative utility value exceeding individual operator strength.
Conclusion & Strategy Guide
This comprehensive r6 tier list provides complete operator rankings for 2025 competitive play, evaluating all operators through systematic analysis of utility, weapons, and meta relevance. S-tier operators like Nomad, Thatcher, Zero, Jäger, Mira, and Aruni dominate through exceptional versatile utility and consistent performance across all scenarios. A-tier operators including Ace, Hibana, Azami, and Bandit offer reliable competitive value with slightly more situational application requirements.
Practical Operator Selection Strategy:
- Master at least two S-tier attackers and two S-tier defenders for guaranteed competitive viability regardless of map or opponent strategy
- Develop role flexibility by expanding your operator pool across different strategic roles including hard breach, support, and entry fragging for team adaptation
- Practice weapon mastery extensively, as superior gunplay compensates for utility mistakes and enables fragging advantages
- Understand map synergies by learning which operators excel on specific maps and sites for strategic selection optimization
- Coordinate team composition by communicating operator selections, ensuring coverage of hard breach capability, projectile denial, and information gathering
- Stay updated on seasonal patches and professional meta shifts, adapting operator priorities as balance changes reshape competitive landscape
Ranking improvement through operator mastery requires consistency over flashy individual plays. S-tier operator mastery provides reliable utility value even during suboptimal individual performance, creating a stable foundation for ranked climbing. Focus on utility deployment timing, position optimization, and team coordination rather than solo fragging attempts that often fail against coordinated opponents.
Professional players achieve success through disciplined operator execution and strategic decision-making, principles equally applicable to ranked progression at all skill levels. The siege operator tier list serves as a strategic foundation for competitive Rainbow Six Siege, but individual skill development and team coordination ultimately determine success. Use these rankings as guidance while developing personal operator preferences and playstyle strengths that complement your natural tendencies.
Ready to dominate rankings with optimal operator selections? Start mastering S-tier operators today and watch your competitive performance transform through strategic operator mastery and disciplined utility management!