What Do You Need to Create CSGO Skins?
CSGO offers a variety of in-game skins that don't impact gameplay, but are still popular because they change the appearance of the weapons. CSGO is one of the most played games for PC, with players spending hours on end grinding for their next skin.
With CSGO, skins can be obtained from opening cases or from the community marketplace. Prices can range from as low as 3 cents to over $50,000. However, most gamers do not want to spend real money on in-game items. Especially since there are several ways to create custom CSGO skins yourself.
You can create your own skin in CS GO for free with a graphic editor. It takes a few hours of time and our step-by-step guide. With a bit of effort, you can have a unique skin that no one else has. This can give you an edge in the game and make you more recognizable to other players.
How to Create CSGO Skins?
To begin with, let’s take a look at the easiest way to create unique skins for Counter-Strike: Global Offensive using the Photoshop image editor. You can use any version of this program to achieve the desired result.
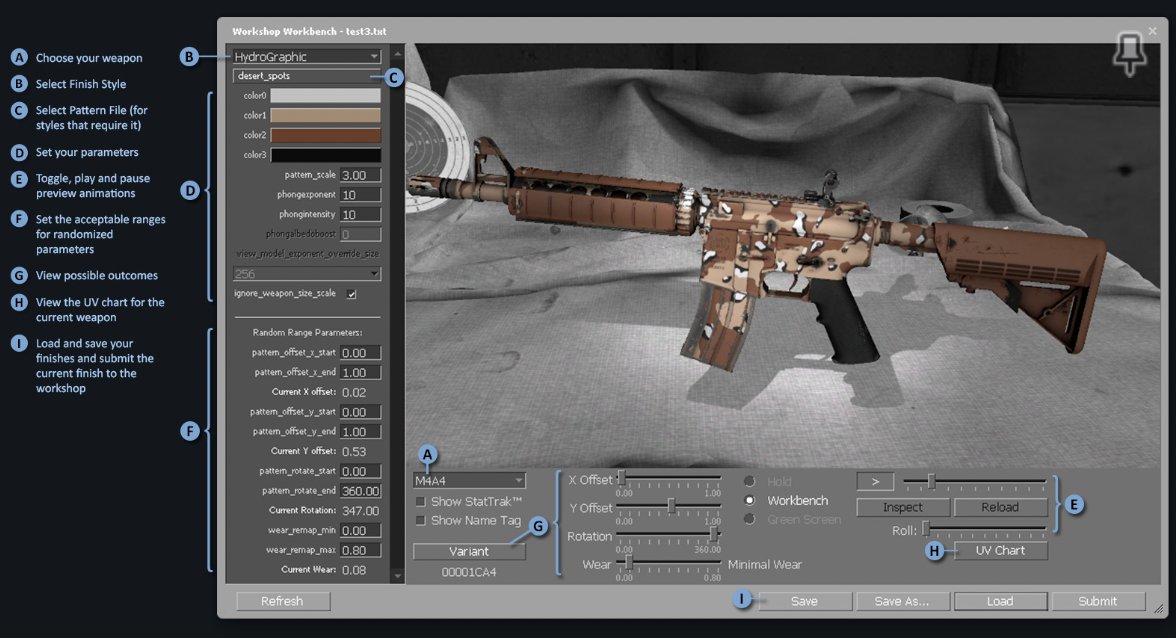
For the final stage of work, you'll need CS:GO Workbench, which is an in-game client where you can inspect the finished skin and set the final parameters.
Here’s what you need to do to create skins:
Step №1: Get the Required Weapon Files
Each weapon skin in CSGO is presented in the format of two files: TGA and OBJ (the TGA offers UV sheets that give the skin an actual texture, while the OBJ files are the 3D model of the skin). Accordingly, you will need to have any of these two files to start to make CSGO skins.
The easiest way to work with textures is to paint over the existing in-game standard skins.
To do this, open the weapons folder in the \materials\models\weapons\v_models directory, find the folder with the desired weapon and open it. There you will see texture files with VTF extension — Valve Texture File, which should be opened with the program VTFEdit and exported to Photoshop with the extension TGA. Now you can work with the texture.
Step №2: Creating the Texture
To apply a sweep to the texture, open the UVSheets folder in the materials for ”Workbench” and find the sweep with the desired weapon.
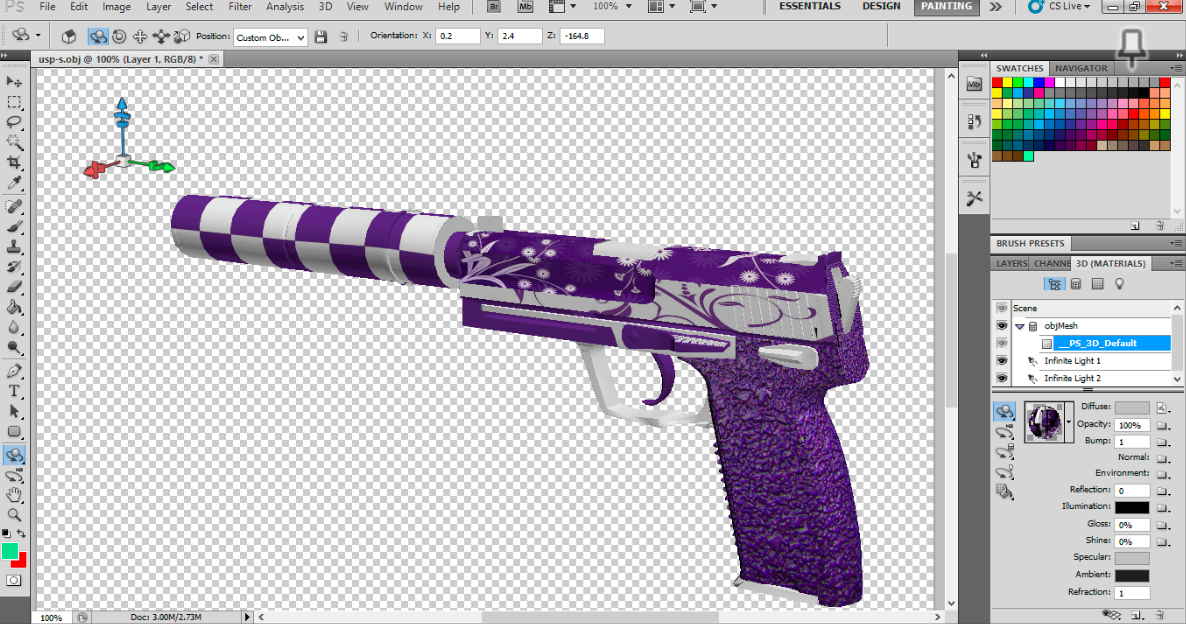
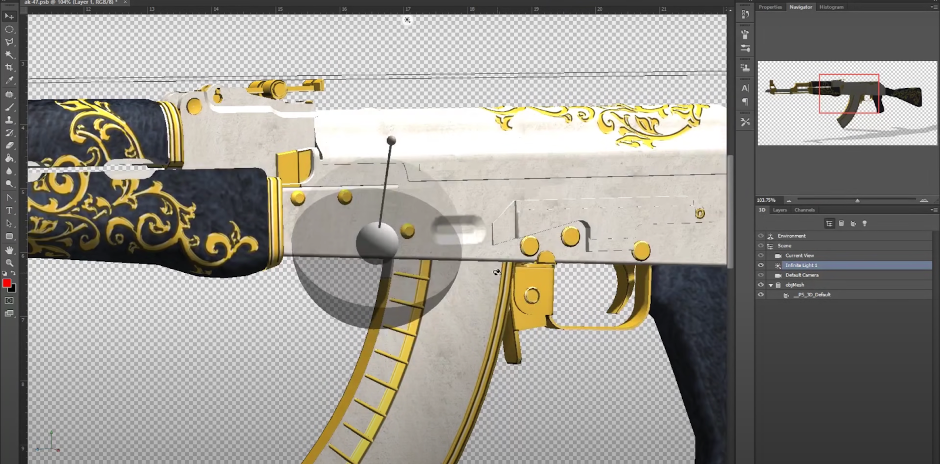
Open the TGA file with the weapon texture in Photoshop and drag to unwrap from the UVSheets folder onto it. The shells will automatically be positioned on the texture, and you can draw on them and then overlay them on the 3D model. To see the texture through the unwrap layer, change the layer settings.
Each skin has a separate texture that determines which elements of the weapon should wear off — the alpha channel. You can use Photoshop to work with the alpha channel.
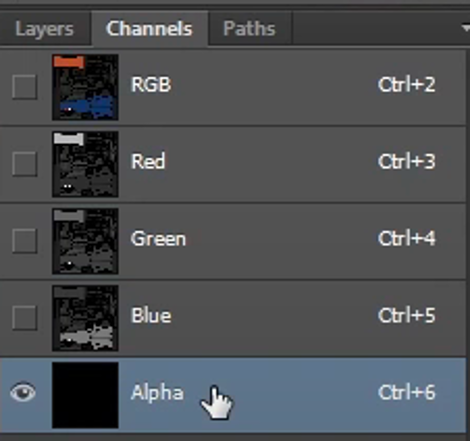
Go to the Channels tab. Those items that should wear out more slowly should be set to darker shades of gray. The lighter the color, the harder the element will wear off.
Select the desired part of the skin on to unwrap in the layer, go to the Channels tab and to the alpha channel.
After all the changes, save the texture.
Step №3: VTF (VtfEdit)
When you have finished working on the texture, you need to convert the texture into an extension that will be recognized by the game.
Open VTFEdit and import the TGA or PNG texture file into it. If the texture has an alpha layer, select DXT5 format in the Alpga Format window that appears during import, if not – in DXTT1. Afterwards, save the file in VTF format.
Step №4: In-game Testing
After editing the content and previewing how it will look in game, you will need to finalize the work in CS:GO. To do this, upload the file, pick how it will look in game and confirm if satisfied. If so, save to CS:GO’s workshop addition, that way you can add more files until the skin is completed.
How to Create CSGO Skins Without Photoshop?

Are you a fan of CSGO and want to create your own skins for the game, but don't have Photoshop? Well, never fear! There are plenty of ways to create skins without Photoshop.
- Using a skin creation tool: There are many tools available online that allow you to create CSGO skins without needing Photoshop. All you require is an image editor (such as GIMP or Paint.NET) and a skin creation tool (such as CSGO Skins or SkinCraft). Simply download the tool of your choice, follow the instructions, and you'll be able to create skins in no time!
- Finding templates: If you don't want to use a skin creation tool, another option is to find templates online. You can search for ”CSGO skin template” on Google, and you'll find plenty of results. Once you've found a template you like, simply download it and open it in your image editor. From there, you can edit the template to create your own custom skin.
- Creating your own template: Finally, if you're feeling ambitious, you can create your very own skin. In order to do this, you'll first have to create an image of your gun in the specific dimensions (by using a reference weapon). Once you've done that, simply open up the ”Pixlr” or a similar program and use the paintbrush tool to draw your skin. Save the image as a PNG file and then open it up in an image editor. From there, you can adjust the levels and colors to get them looking exactly how you want them!
Creating CSGO skins without Photoshop is definitely possible, and there are a few different ways to do it. If you're looking for an easy way to create skins, then using a template is probably your best bet. However, if you're feeling more creative, then you can always try designing your own skin from scratch. Whichever method you choose, just make sure that you have fun with it and experiment until you find something that works for you.
Conclusion
Making CS:GO skins for free is a great way to get started in the world of skin design and creation. With a bit of practice, you can create some amazing designs that people will love to use in their game. If you're not sure where to start, we recommend checking out some tutorials on our website. Once you've got the hang of it, there's no limit to what you can create!